Sneaking more veggies into our mouths
I regularly add recipes into this blog,
giving more ideas of how to to fit more vegetables easily into our lives.
Bookmark this page to stay up to date on the updates!

Peeling & Seeding Tomatoes
Nothing beats using fresh tomatoes for all the soups, stews, & sauces that we know & love.
The small amount of added cooking time is worth it, & the process is super simple.
Depending on how many tomatoes you are working with, this whole process takes about 30 minutes from start to finish.
*Recipe for Creamy Tomato Soup is just below!
The Process
Start with your favourite tomatoes. Wash them thoroughly, removing any stickers & stems.
Make an X on the bottom of the tomato. This will make peeling MUCH easier.
Boil water in a pot big enough to easily fit in all of your tomatoes.
As it’s boiling, prepare an ice bath, filling your sink with cold water & ice or ice packs..
Place tomatoes in the boiling water, and let them sit for 45 seconds to 1 minute seconds, or once you see that the skin is starting to peel.
Immediately put the tomatoes in the ice water, & let sit until cool.
It should be quite easy to remove the skins at this point with your hands, although you can use a parking knife.
Slice the tomatoes horizontally, on the ‘equator’, to expose the seeds.
Remove the seeds, using a spoon or knife. Discard the seeds & peelings.
Chop the tomatoes up coarsely, keeping any liquid so it can be added to your sauce, stew or soup!

Creamy Tomato Soup
Once you have the tomatoes peeled & seeded, the rest of this recipe comes together in no time.
For me, there is nothing more comforting than this soup served with a thick slice of crusty bread
OR homemade croutons (Crouton recipe is below)!
Makes 6 meal-sized servings.
This recipe takes an 1 hour maximum from start to finish, but it’s a very easy recipe, so the hour is a very relaxing one ;)
Ingredients
Soupy Part:
1 1/2 tbsp olive oil
2 cups chopped onions
5 cloves garlic, peeled, chopped, & minced ( I like a lot of garlic. Feel free to use less)
Salt & Pepper to taste
1 tsp dried thyme & oregano
5 cups peeled & seeded tomatoes
1/3 cup tomato paste (a small can)
2 1/2 cups of chicken or veggie broth
Creamy Part:
2 tbsp butter
1/4 cup flour
1 cup cream
The Process
Saute the onions in the olive oil for at least 10 minutes at low-med heat in your soup pot, but for as long as 20 on low heat. I personally love sauteeing for a longer time at lower heat for maximum carmelization & flavour.
Add the garlic to the onions & saute for another 5-10 minutes.
Add the peeled & seeded tomatoes, tomato paste, herbs, & broth. Stir in gently until combined. Bring to a boil, then immediately turn down the heat to a low simmer for 20-30 minutes.
Puree the soup in a food processor or immersion blender. Be careful. The soup is hot. Only fill the food processor 1/2 way.
For the creamy part:
In a smaller saucepan, melt butter on low heat.
Add flour & whisk quickly in until it’s smooth.
Slowly add cream & whisk in until smooth. It should be yogurty thick.
Off the heat, slowly add the cream sauce into the soup, stirring well to combine.
Feel free to add more cream or broth so that it is to your desired consistency.
Serve with grated parmesan & a thick crusty bread - or homemade croutons!
See the Caesar Salad recipe below for my homemade crouton recipe :)

Caesar Salad with Homemade Croutons
& Easy Vinaigrette
As with any Caesar Salad, it’s all about the dressing & the croutons!
After discovering how simple & delicious this recipe is,
you won’t feel tempted to eat the restaurant version ever again.
This recipe is enough for 6 big servings.
Add a protein on the side, such as sauteed shrimp, grilled salmon or chicken, & you have a gorgeous meal.
Ingredients
Croutons
3 thick slices of your favourite bread (I used sourdough multigrain - yum!), cubed
1/4 cup olive oil
4 large cloves garlic, very well minced
1/4 cup freshly & finely grated, good quality parmessan cheese
Dressing
2 large garlic cloves, very well minced
1 tbsp dijon mustard
2 tbsp Worcestershire sauce
2 tbsp lemon juice
3 tbsp red wine vinegar
1/3 cup olive oil
salt & pepper
Salad
1 large head romaine lettuce, OR 2 medium sized heads of butter lettuce (my preference!), washed, dried, & torn into small pieces
2 large tomatoes, coarsely chopped
1/3 cup freshly grated, good quality parmessan cheese
optional add-ons: sliced avocado, shrimp, grilled salmon, chicken
The Process
Start with the Croutons:
Preheat the oven to 300F
Arrange the bread cubes close together on a baking tray.
Mix together the olive oil & minced garlic, and drizzle over the bread cubes, so they are evenly & lightly coated.
Sprinkle the parmessan lightly & evenly over the bread cubes.
Space the cubes out a little more & bake for 20-30 minutes, checking every 10 minutes to see that the bottoms get perfectly browned to your liking.
Salad Dressing:
Mix together all the dressing ingredients, except the olive oil, in a jar.
Make sure the lid is sealed tightly, & shake well.
Then slowly stir in the olive oil, and set aside.
The Salad:
Add the torn lettuce & parmessan to a large salad bowl & gently toss to combine.
Give the dressing another stir, so the oil is blended in with everything else, and drizzle 1/2 of the dressing into the salad.
Gently but thoroughly mix, give it a taste test, and then add more dressing to your liking.
Gently stir in the tomatoes, giving the salad a final, gentle mix.
Plate the salad, topping with the croutons & any extra options that you like.
Enjoy!

Lemon-Dijon Green Beans with Almonds & Feta
Beautiful flavour - light AND rich!
Takes 30 minutes to make from start to finish & serves 6 as a side dish.
Ingredients
1 1/2 pounds green beans, washed, ends trimmed, & cut into 2-3 inch pieces
1/2 cup coarsely chopped or slivered almonds
3 tbsp olive oil
2 tbsp lemon juice - from about 1 lemon
1 tbsp lemon zest (from 1 lemon)
1 tbsp dijon mustard
1 garlic clove, peeled & minced
salt & pepper to taste
1/2 cup crumbled feta cheese
The Process
First, toast the almonds in a skillet big enough to steam the green beans once the almonds are done. Have the skillet on medium heat, add the almonds & toast for 8-10 minutes, stirring frequently to prevent the almonds from burning. Remove the almonds & set them aside.
Turn the head to medium-low & add the green beans in 1/3 cup of water, just enough to cover the bottom of the skillet. Cover & let steam for 5-8 minutes, until crisp-tender. Then remove the lid & continue to cook for another 5 minutes until almost all the water evaporates.
While things are cooking on the skillet, combine all ingredients from olive oil to salt & pepper in a small bowl, gently whisking. Add a few tablespoons of water to make the sauce slightly runny.
When the green beans are done, turn off the heat. Stir the mustard-lemon dressing into the skillet, along with the almonds.
Serve immediately with the feta cheese. It’s great if the heat of the beans slightly melts the feta!
Enjoy!


Basil-Arugula-Feta-Walnut Pesto
I made this whole thing in 20 minutes using leftovers. Delicious.
Feta health facts:
contains higher calcium levels than most cheeses
lower in fat than most cheeses
easier to digest than most cheeses
high protein source
contains CLA, a fatty acid shown to support weight loss
high in probiotics (good for gut health )
(enjoy in moderation - as in this recipe - because like all cheeses, feta is high in sodium)
Ingredients
4 cups loosely packed, washed, fresh basil & arugula
1/2 cup walnuts - toasted for 5 minutes on a medium heat skillet
3 garlic cloves - peeled, coarsely chopped, and if you like, lightly toasted on low-medium heat skillet in olive oil for 3 minutes. Raw garlic will create a more strong flavour. Toasting it will mellow it out a little bit.
1/3 cup feta cheese
1/3 cup olive oil - plus more depending on desired consistency
*optional garnishes when serving
avocado - can be mixed in with the pesto itself, or served on the side
lemon wedge - squeeze the juice over everything to freshen it all up
grated parmessan
The Process
Using a food processor or immersion blender, blend the greens, nuts & garlic to a paste.
Add feta & continue to blend.
Slowly stir in the oil, adding more if you like, to create the desired consistency.
Done!
Serving suggestions:
Stir it into your favourite freshly cooked pasta. The heat from the pasta will heat up the pesto. You may want to add a touch more olive oil to get a good consistency.
Serve with avocado (blended into the pesto or on the side), a lemon wedge, and/or freshly grated parmessan.
Store leftovers in an air tight container in the fridge for up to 7 days, or in the freeser for up to 3 months.
It may need to be stirred when re-using.
Enjoy!
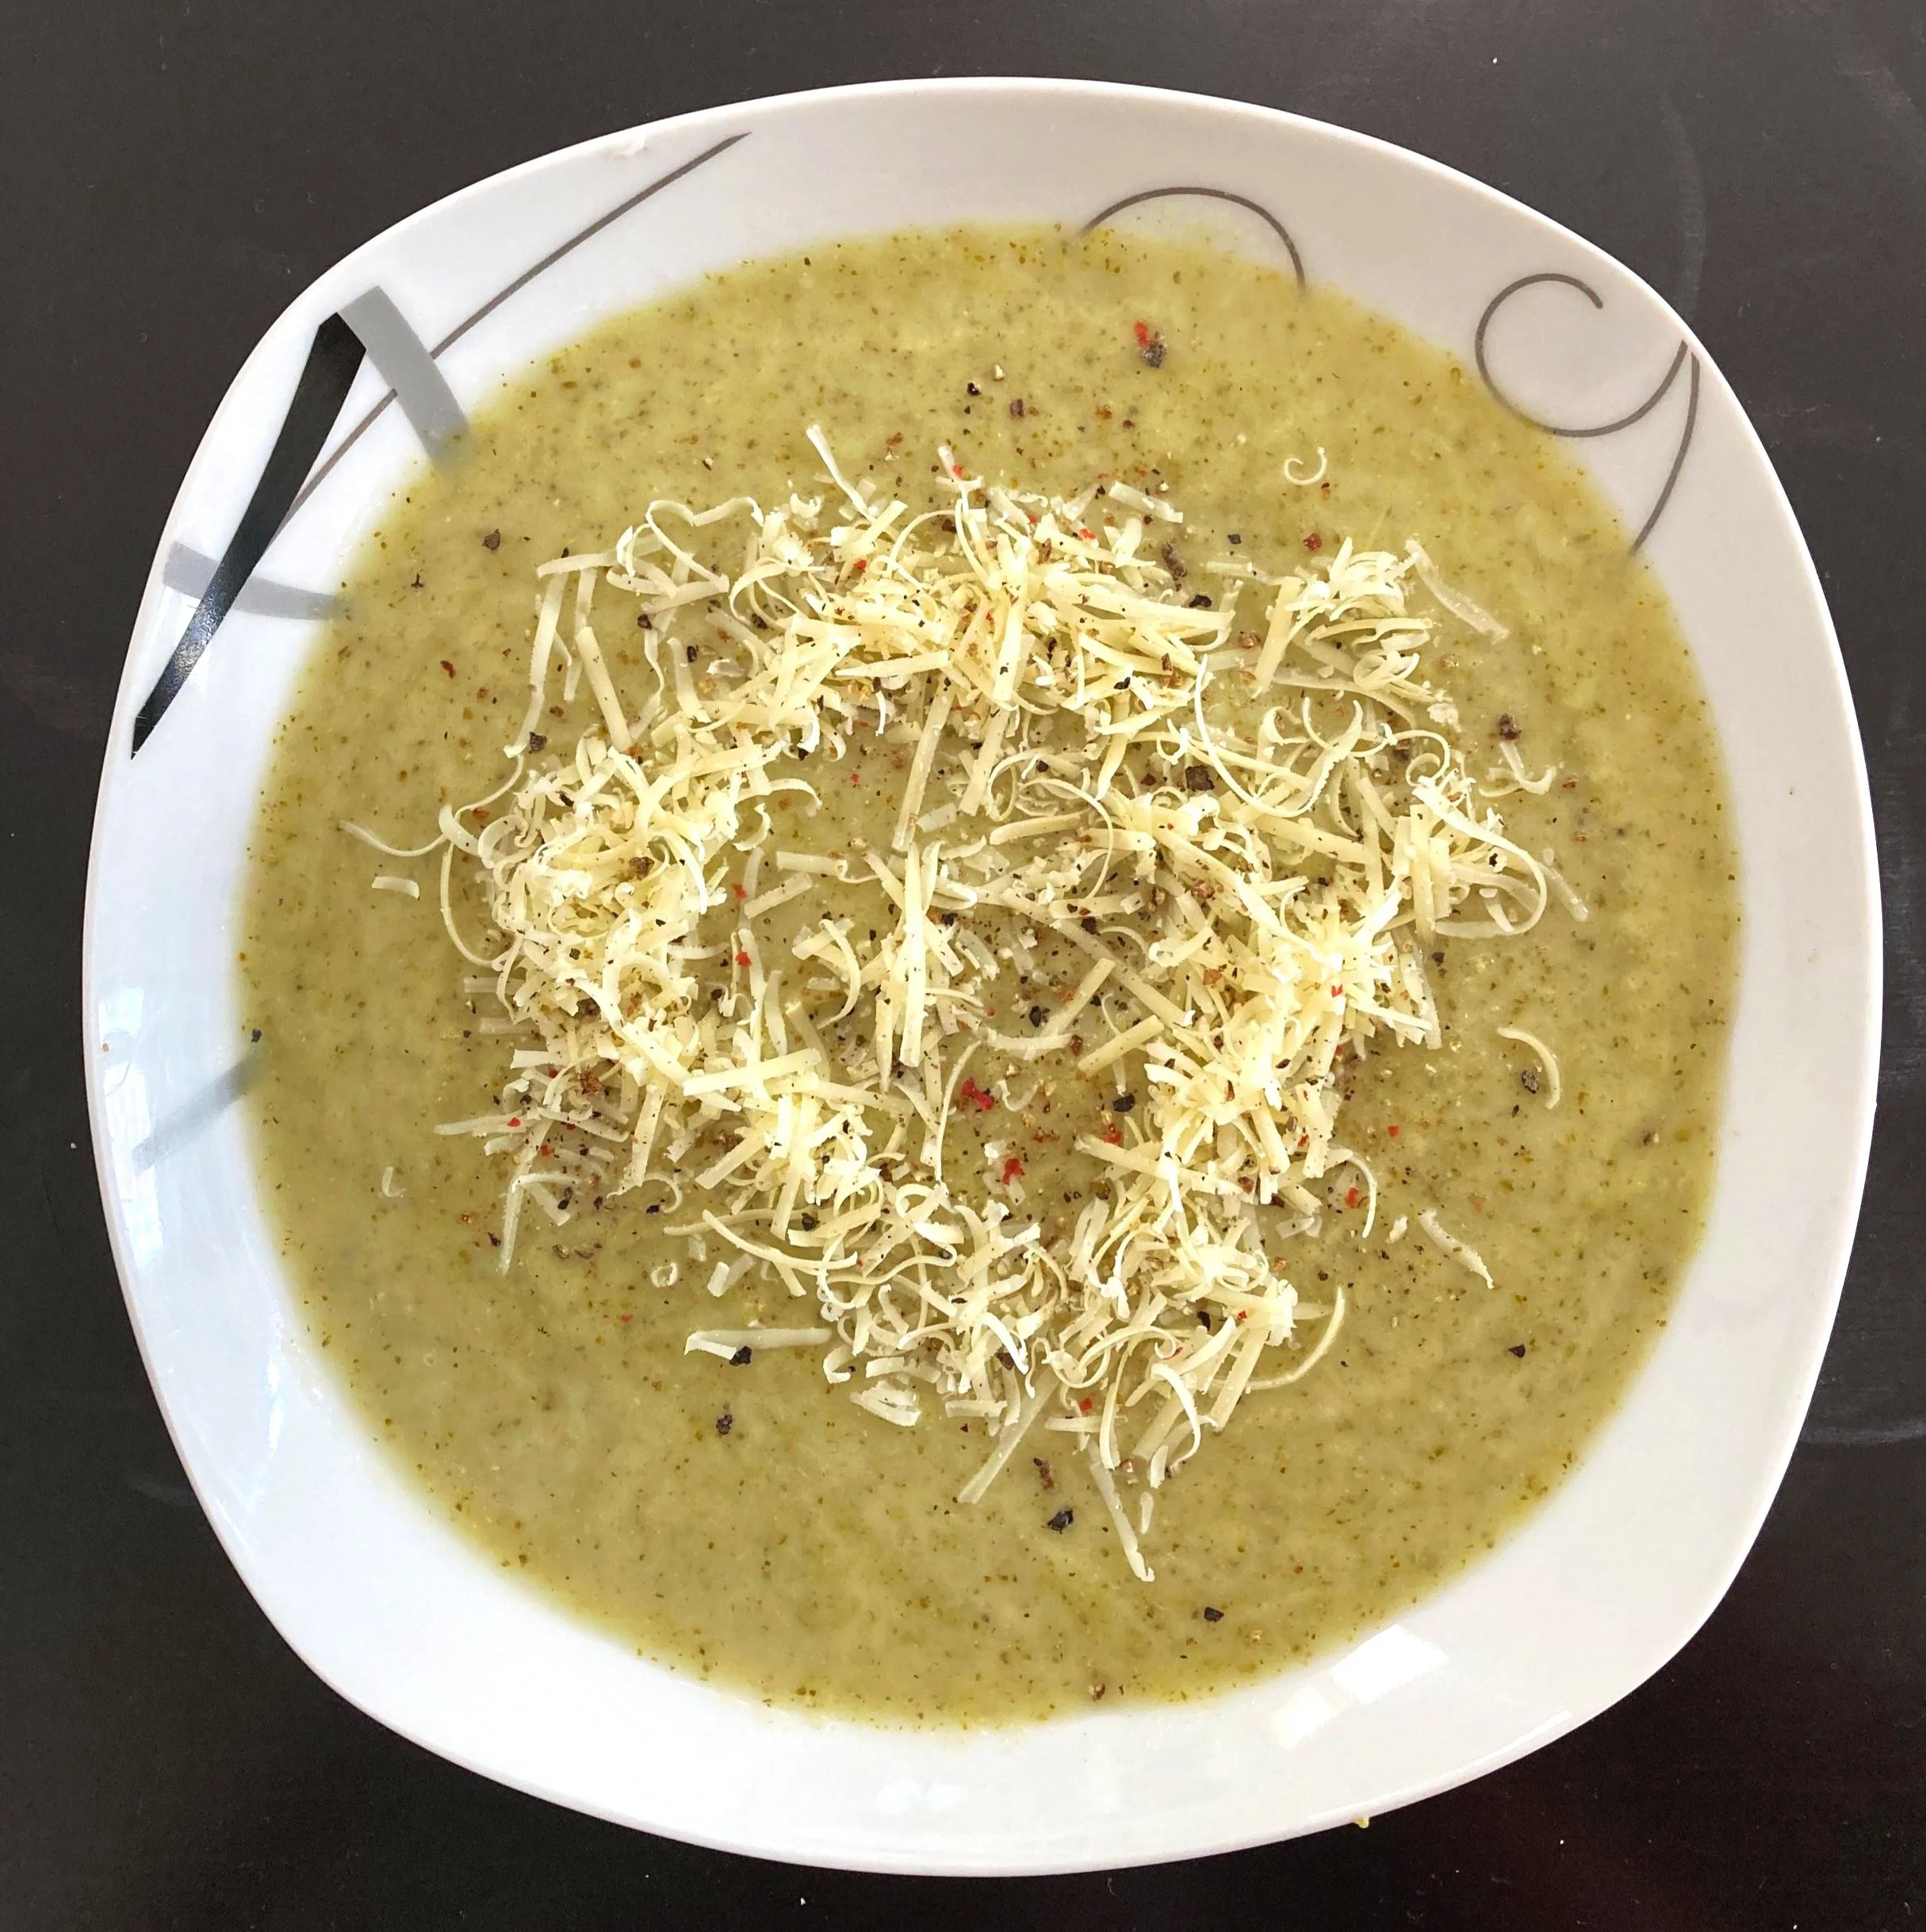
Cream of Broccoli Soup
I love soup, especially if it’s creamy!
This recipe is simple & wholesome, full of veggies, micronutrients (broccoli is a superfood), fiber, & flavour.
Serve with a protein-rich, whole grain sandwich for a complete meal.
Takes 1 hour from start to finish, Makes 6 meal-sized servings
Ingredients
Olive oil
2 large onions, peeled & chopped into 1 inch pieces
4 cloves garlic, peeled & minced
1 medium potato, peeled & chopped into 2 inch pieces
1 medium apple, peeled, seeded & chopped into 2 inch pieces
1/4 cup white wine or apple juice
1 large head broccoli, stem peeled & chopped, florets cut into 2 inch pieces
1 tsp each parsley, oregano, & thyme
1/2 tsp each salt & pepper
3 cups vegetable broth
1/2 cup heavy cream
grated parmessan to serve
The Process
In a large soup pot, pour glug of olive oil in with the onions. Saute on low heat for anywhere from 5 to 20 minutes. (If sauteeing for a shorter time, such as 5-10 minutes, raise heat to medium-low. I like sauteeing for a longer time on lower heat while I get the rest of the veggies chopped & ready).
Add garlic, applies & garlic, & saute for 5 minutes, making sure the garlic doesn’t stick to the bottom. Then add the white wine/apple juice & saute for 5-10 minutes more.
Add the broccoli & dried herbs, & stir to combine. Then add the broth. It should not quite cover the veggies, so add more or less broth as needed. Bring to a boil, then immediately reduce heat to a low simmer, letting veggies get quite soft - simmering for around 20 minutes.
Take the soup off the heat & let sit for 5-10 minutes, allowing some of the heat to escape.
Puree soup to your desired consistency - more creamy or more chunky - using a food processor (don’t fill to the top & remove top often to allow some of the heat to escape) or an immersion blender.
Return the soup to the pot. Gently heat the cream (NOT to a boil) in a microwave or on the stove in a small saucepan, adding in some of the grated parmessan if you choose. Slowly stir the cream into the soup until thoroughly blended in.
Serve with more parmessan, fresh pepper, & a protein-rich sandwich.
Enjoy!

‘Stuffing’ w/ White Beans, Sourdough, Chorizo, & Lots o’ Veg
My favourite way to make stuffing!
I’m using the quotation marks because, although this dish isn’t really stuffed into anything,
it satisfies that cozy, comfort food feeling that every good stuffing has.
The blend of flavours textures - sourdough bread, chorizo sausage, apple, leek, Brussel’s sprouts, lots of veg, along with the white beans - creates a savoury, substantial accompaniment to whatever the main event is.
This recipe will take almost 2 hours from start to finish, with 1 hour of hands on time (the rest is cooking time).
Serves 8 as a side dish
Ingredients
Olive oil
2 medium onions, coarsely chopped
3 celery stalks, chopped
2 medium carrots, sliced & halved
4 cloves garlic, peeled & minced
3 medium leeks, sliced, white parts only
2 medium apples, peeled, cored, & chopped
1 /12 cups Brussel’s sprouts, outer leaves removed & quartered
1/2 tsp ea thyme, oregano, parsely, rosemary
salt & pepper
1/2 cup dry white wine
2 chorizo sausage
2 cups cannellini beans, rinsed
3 cups sourdough bread cubes
1 cup veggie broth
1/2 cup grated parmessan (optional)
The Process
Preheat oven to 375
Once the oven has reached temperature, cook the chorizo for 20-25 minutes or until the juices run clean when pierced with a fork. Once the chorizo is done, take it out of the oven (keep the oven on!) and slice & quarter.
Meanwhile, in a large pot, saute on low-medium heat: 1 tbsp olive oil & onion. Let it sweat for 5 minutes before adding in the next veggie on the list. Add in each subsequent veggie (or fruit!) 1 at a time, up until the Brussel’s sprouts, allowing about 5 minutes in between each one for things to sweat & for flavours to blend.
Once everything up until the sprouts is in, add the herbs & wine, cover and let it gently cook for about 10 minutes. Add in the white beans & cook for another 5-10 minutes, letting all flavours combine.
In a 9x13 casserole dish, fold in the veggies & beans, chorizo, & the sourdough cubes, combining gently. Slowly pour in the veggie broth.
Cover & cook for 40 minutes, adding more broth if necessary (there should always be a little bit of liquid at the bottom).
Uncover & cook for another 10 minutes, lightly topping with grated parmessan, if you like.
Let it sit for 10 minutes out of the oven to let the liquid absorb into the casserole, then serve.
Enjoy!
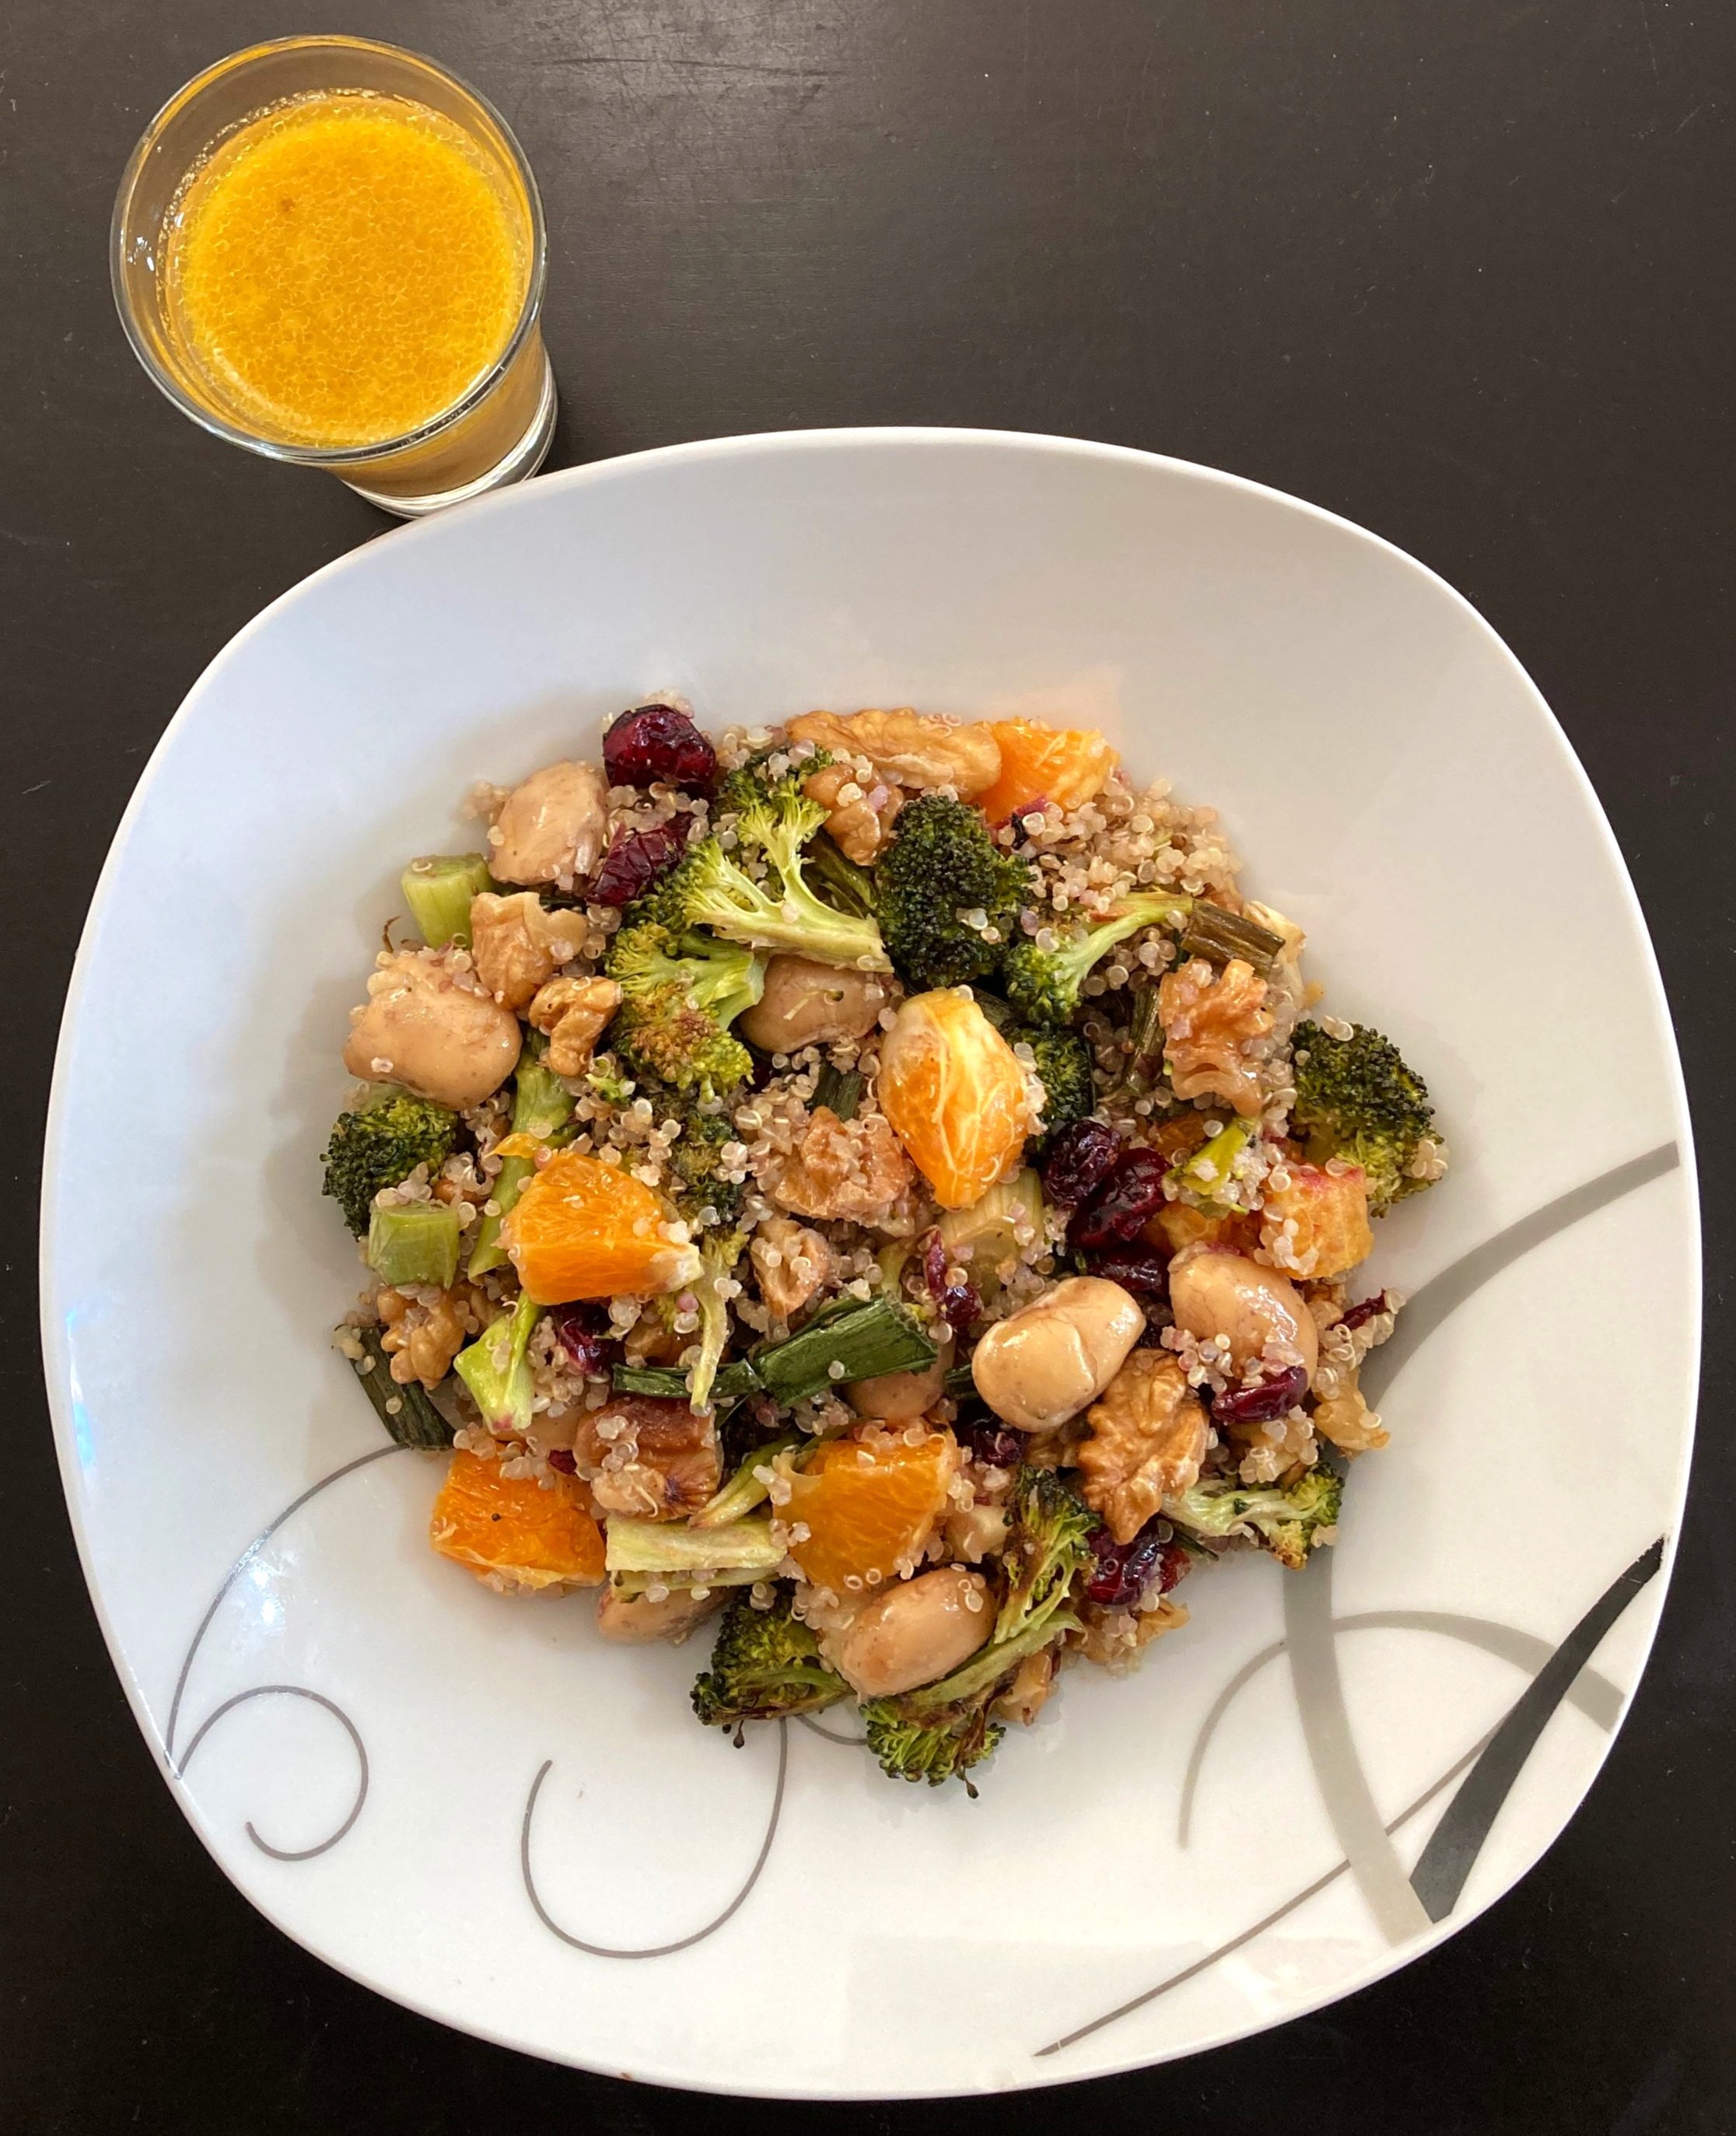
Broccoli, Butter Bean, & Quinoa Salad
with Orange Vinaigrette
This simple salad has a delicious mix of colours, textures, & flavours.
The vinaigrette brings a lovely freshness to the roasted veggies.
It all tastes much better the next day, too!
Ingredients
1 medium-sized head broccoli, cut into small florets
4 green onions, cut into 1” pieces
1 small can (approx 340g) Butter Beans, or any other white bean
1 cup coarseley chopped walnuts
1 1/2 cups cooked quinoa ( simmer 1/2 cup rinsed quinoa in 1 cup water for 15 minutes)
1 orange, peeled & chopped into 1 inch pieces
1/2 cup dried Cranberries
1/3 cup soft cheese, such as goat cheese. I used soft mozzarella. Cut into very small pieces.
Orange vinaigrette
2 tbsp apple cider vinegar
1/4 cup orange juice ( from about 1 orange)
1 tbsp honey
2 tbsp dijon mustard
1/3 cup olive oil
S&P to taste
The Process
Preheat the oven to 375F
Spread the broccoli (lightly tossed in olive oil and S&P to taste) on a roasting tray & roast for approx 20 minutes.
Roast the green onion for approx. 10 minutes.
The exact roasting time depends on how browned you like to have the veggies ;)
When done, add to a salad bowl.
Roast the rinsed butter beans & chopped walnuts on the roasting tray for 8-10 minutes (no oil or S&P). Add to the salad bowl.
Cook the quinoa with a ratio of 2 parts water to 1 part quinoa. Once they are done (approx. 15 minutes) remove from heat, let sit for 5-10 minutes, then fluff with a fork, and add to the salad bowl.
Add in the chopped orange & dried cranberries.
Whisk together all the vinaigrette ingredients, except the olive oil. Then, slowly stir the oil in. Set aside.
At the time of serving, add the cheese, and 1/2 the dressing. Gently stir to combine. Then, add more dressing to your taste, as you like.
Enjoy!


Easy Peasy Healthy Granola!
This homemade granola is so easy to make, it will take away any temptation to buy store bought again.
Store bought granola can be delicious, it it can also have lots of unwanted add-ins, such as highly processed oils, excess sugar, and preservatives.
Nuts are a source of many essential micro-nutrients & are loaded with antioxidants, fiber, anti-inflammatory properties, & good fat. They have been shown to raise our ‘good’ cholesterol & lower our ‘bad’ cholesterol, making them very heart healthy. While they are high in calories, they are also high in fiber, so we don’t actually absorb all the calories in them (if you catch my drift ;)
What’s more, when nuts & grains (like the coarse ground oats in this recipe) are combined, they create a complete protein!
Extra add-ins like ground chia, hemp or flax add even more omega 3, protein, & fiber.
This recipe takes about 1/2 hour from start to finish.
Ingredients
3 cups old fashioned rolled oats (not instant or quick cooking oats)
2 cups coarsely chopped raw nuts & seeds (I used walnuts, almonds, cashews & pepitas/pumpkin seeds)
1/3 cup coconut oil, melted
1/3 cup honey, melted
1 tsp sea salt
1 tsp vanilla extract
Optional: 1/2 tsp cinnamon
Additional post-baking options: chia, hemp or flax seeds (whole or ground) coconut flakes, dried berries, chocolate chips
The Process
Heat the oven to 350F
Mix all the ingredients together in a large bowl, from oats to vanilla, making sure everything gets a light coating.
Spread it all out on a large baking sheet.
Bake for 18-24 minutes - stirring 1/2 way through, checking for a lightly browned color & a toasty aroma.
Once it is done, immediately scrape it all out of the baking sheet & into a large bowl. Let it cool there, so that it doesn’t stick to the tray. Once the granola has cooled down, stir gently to break it up, keeping it as chunky as you like.
Feel free to add in any of the post-baking options.
Enjoy!

Chicken Veggie Coconut Soup
This soup has all the comfort of any chicken soup, but with the creamy sweetness of coconut.
Tumeric is a very powerful antioxidant & anti-inflammatory that’s shown to be beneficial for the heart, brain, & joints. It’s best absorbed when combined with black pepper & fat (like that found in the olive oil, coconut milk & chicken).
Ingredients
Olive oil
4 chicken thighs
2 large onions, chopped small
2-3 inches ginger, peeled & minced
4 cloves garlic, peeled & minced
1 tbsp tumeric
1/2 tsp black pepper
1 tsp smoked paprika
2 tbsp fish/oyster sauce
1 tsp honey
3 stalks celery, chopped
2 medium carrots, sliced & quartered
1 medium sweet potato, peeled & chopped into small pieces
1 small head broccoli, stalk discarded, florets cut into small pieces
1 medium red pepper, cut into small pieces
5 cups veggie broth
1 can (14oz/400ml coconut milk)
The Process
To save time, brown the chicken in a separate pan drizzled with olive oil, sprinkled with salt & pepper. Brown on med-low heat for approx 10 minutes on each side. When they are fully cooked, with juices running clear & internal temp of 165F, set aside until cool enough to chop into bite sized pieces.
Meanwhile, in the soup pot, add the onions with a glug of olive oil, with heat on low. Let the onions slowly carmelize for up to 20 minutes while the other veggies are chopped & prepped.
After 10-20 minutes, (if you have the time, my vote is to let the onions carmelize for closer to 20) add the ginger & garlic, tumeric, pepper, paprika, fish sauce, honey, & possibly a small amount of broth to ensure no sticking or browning happens. Let saute 5 minutes, then add celery & carrots & saute for 10 minutes more.
Add the sweet potato & 1/2 the broth, turning the heat to med-low. Let it simmer gently for 5-10 minutes.
Finally, add the chopped chicken, broccoli, red pepper, & remaining broth.
Bring the soup to a gentle simmer, letting everything blend for about 20 minutes, or until the sweet potato is soft.
Stir in the coconut milk. Heat everything through & serve immediately.
Enjoy!

Roasted Butternut Coconut Soup
The combination of roasted veggies plus the coconut milk gives this soup a very gentle sweetness. This soup was very well received by my guests. I’ll be making it again soon.
Although the soup takes just over an hour to make, it requires very little hands on time. Once you have the veggies in the oven, you can relax and do other things, like enjoy the company that you are with.
Ingredients
1 Butternut squash, sliced in half, seeds & pulp removed
4 medium onions peeled & quartered
1/2 head garlic, tops chopped off so flesh is revealed
2 inches (squared) fresh ginger, peeled, quartered & smashed
1 apple, peeled, seeded, & quartered
olive oil
salt & pepper
2 cups veggie broth
400ml (14oz) coconut milk (if cream & water are separated, mix it all together first)
The Process
Preheat the oven to 400F
Place all the veggies on a roasting tray (place squash with flesh side down) & brush or drizzle lightly with olive oil, ensuring that everything is lightly coated. Sprinkle with salt & pepper.
Roast for 40 -50 minutes, stirring everything lightly (except the squash) 1/2 way through the roasting time. Remove when everything is soft. Everything, except the squash, should be lightly carmelized, but not burned. Let it all cool for 10 minutes.
Discard the skin from the squash & place the flesh in the soup pot. Remove the skins from the garlic. Coarsely chop the apples, onions, ginger, & garlic on a cutting board, then add to the soup pot. Add 1/2 of the broth & gently stir to combine.
Puree the soup using a food processor or an immersion blender. If using a food processor, return everything to the soup to the pot. Put it on low heat & slowly stir in the rest of the broth & coconut milk. Gently heat it through.
Serve immediately, or if you have time, let it sit & cool (this allows the flavours to combine). Reheat just before serving.
Serve on its own, or to make it a complete meal, add a protein on the side. (I served this with grilled sandwiches, filled with cheese, smoked turkey, sliced tomato & lettuce).
Enjoy!

Hidden Veggie & Lentil Locro
Locro & Guiso de lentejas (lentil stew) are 2 common stews made throughout the Andes regions of South America, which includes Argentina, where I currently am thrilled to call home.
Both are commonly enjoyed around the national holiday time in May, so I decided to make my own version, combining elements of both recipes into 1 hearty & tasty stew!
Stew is a great place to hide veggies, by the way.
The secret is in chopping them up finely, so they just kind of blend into the stew-y goodness.
This stew has a tomato base, plus some add-ins that give it a rich bbq sauce kind-of flavour, which really warms the belly. This is a perfect cool weather stew, or chili substitute.
Feel free to experiment with the veggies that you add!
Squash is a common ingredient, as are other beans & peas. I was going to add Brussel Sprouts (which I think would be fantastic!), but I chose cauliflower instead. This version is NOT vegetarian/vegan, but feel free to omit the meat. If it’s served with rice or whole grain bread, along with the lentils there will be plenty of protein (combining a legume with a grain makes a complete protein).
Makes 1 big pot, enough for 8 meal-sized servings.
Hands on time for cooking is 1 hour, with an extra hour for simmering.
I love taking my time with my cooking, which is perfect when cooking soups & stews. I enjoy taking my sweet time to chop the veggies & to smell the pot over & over again to see what more it needs as it simmers. For these reasons & more, I love making stews at night, when I am more relaxed. The radio or a podcast often keeps me company as I take my time & enjoy the moment. While this stew simmered away, I slowly cleaned up, enjoying the smells all the while.
Ingredients
2 ears of fresh corn
4 large beefsteak tomatoes
Olive oil for cooking
1 lb of pork, beef or chicken, (I used pork) cut into small chunks, with excess fat removed
3 large onions, chopped small
5 cloves garlic, peeled & minced
3 stems celery, chopped small
1 small head of cauliflower, chopped into small pieces
1 bunch of spinach, chopped quite small
2 cups broth of your choice
2 cups cooked lentils, rinsed & discolored ones removed
Sauce - If you don’t have all of these ingredients, and/or you are pressed for time, you could use a bbq sauce
1/2 cup tomato paste
3 tbsp Worcestershire Sauce
3 tbsp apple cider vinegar
2 tbsp honey
1/2 tsp paprika (smoked if possible)
1/2 tsp cumin
1/2 tsp onion powder
1/2 tsp garlic powder
1/4 tsp ea of salt & pepper
NOTE: if you are using meat/chicken, I recommend taking 1/2 of the above 6 spices (paprika to pepper) and rubbing them onto the meat before browning.
The Process
If you are using meat/chicken, take 1/2 of the spice amounts in the sauce & rub them into the meat. Let sit for 30 minutes (if you are using chicken, keep it refrigerated)
In your stew pot, first boil the ears of corn for 10 minutes in plenty of water (pinch of salt added), while you get everything else chopped & ready. Once the corn is done, keep the water boiling & set the corn aside to cool.
Get an ice bath ready of cold water with ice cubes in a bowl big enough to comfortably fit the tomatoes. Slice an X on the bottom of the tomatoes & place in the boiling water for approximately 1 minute, or once the skins begin to naturally peel off. Immediately place the tomatoes in the ice bath & let cool.
Drain the water out of the stew pot, turn heat to medium, & add a small glug of oil, just enough to coat the bottom of the pot. Add the meat/chicken & brown on both sides - approx 5 minutes each side. Then set the meat/chicken aside, keeping any liquid or bits in the pot.
Add the onions to the pot, scraping up any brown bits, & turning the heat to low. Let the onions slowly soften for about 10 minutes. This gives you time to get the other ingredients together. make sure the onions don’t brown or stick.
After about 10 minutes, add the celery, garlic, & cauliflower and once more let them slowly soften for about 10 minutes, making sure they don’t brown or stick (add a small amount of water if necessary).
Back to the corn: once it’s cooled, cut off the kernels, holding the corn vertical & slicing down.
Back to the tomatoes: once they are cooled, peel off the skin. Then slice in half & remove the seeds. Chop up the tomatoes into small chunks.
Now, add into the soup pot the chopped tomatoes, corn, lentils, meat/chicken & 2 cups of broth.
Bring to a boil, then immediately turn down to a simmer.
Prepare the sauce ingredients in a small bowl, then add to the pot.
Simmer for an hour for maximum tenderness of all ingredients. Add more water/broth as needed.
Garnish with fresh parsley &/or parmessan. Serve with crusty bread, rice, or tortilla chips. Enjoy!
Keeps in the fridge for 5 days, & in the freezer for 3 months.

Roasted Veggie Miso Soup
I was looking for something new to do with a bunch of lovely Brussels Sprouts (one of my favourite foods, not only for its taste, but for the fact that, as a cruciferous vegetable, it is super high in vitamins C & K, antioxidants, fiber, prebiotics, and has shown to be good for heart health & for keeping blood sugar levels stable.
I love roasting Brussels Sprouts, so I did that (along with roasting many of the other veggies), and then put it all together in a soup! The roasting allows everyting to get a little carmelized and a bit ‘soft on the inside, crunchy on the outside’. It helped everything keep its shape instead of getting soggy.
Miso broth has a wonderfully earthy flavour, AND it’s a fermented food, making it great for our gut.
Wholesome goodness!
This simple recipe takes about an hour from start to finish, & makes enough for 6 meal-sized servings.
Ingredients
Olive oil
Salt & pepper
3 large onions, peeled & chopped
5 cloves garlic, peeled & minced
4 stems celery, chopped
1 large apple, peeled & chopped
3 Cups Brussels Sprouts, outer layers peeled away & quartered
2 large carrots, sliced & quartered
2 large potatoes, peeled, chopped, & soaking in water until ready to roast.
1 big bunch flat-leaf parsley, stems removed (you could substitute a small bunch of spinach, but I like the flavour of the parsely, plus it’s also packed with micronutrients!)
1 tsp ea oregano & thyme
5 cups miso broth, or 1 heaping tbsp of miso paste in 5 cups water
The Process
Preheat oven to 400, as you get the veggies washed, chopped, & ready
Once the oven is ready, spread the Brussels Sprouts out on the roasting pan, so they aren’t touching. Drizzle olive oil on top, sprinkle with S&P, and toss so that everything is lightly coated. Roast for 20 minutes, giving the pan a stir 1/2 way through. Once they are done, put them aside.
While the sprouts are roasting, get out your soup pot. On low heat, add a small glug of olive oil plus the onions. Let slowly soften for about 10 minutes.
Back to the roasting: Once the sprouts are done, repeat the roasting process with the potatoes (pat dry off excess water), & carrots, also tossing in oil, S&P. Roast for approx 20 minutes, giving the pan a stir about 1/2 way through.
Back to the soup pot: add the garlic, celery, & apple. Saute for another 10 minutes on low heat. Add in a small amount of water if needed to ensure that nothing sticks.
Once all sprouts, carrots, & potatoes are done, add them to the soup pot, plus the miso broth, parsley, oregano & thyme (all remaining ingredients!).
Bring to a low simmer for 10-20 minutes to let the flavours combine. Add more broth as desired.
Serve with crusty bread.
Enjoy!

Cream of Cauliflower Soup with Baked Salmon
A beautiful combination of cruciferous veggies & omega-3 rich protein.
I try to treat all animal protein as a condiment, so that rather than taking up the majority of my plate, it’s just an added extra shot of nutrition.
Roasting the onions, garlic & cauliflower makes a huge impact on the taste of this VERY delicious soup.
This whole very simple recipe takes about an hour from start to finish & makes 6 meal-sized servings.
Ingredients
Olive oil
salt & pepper
3 large onions, thinly sliced
5 cloves garlic peeled & smashed
1 large head of cauliflower (or 2 small), chopped into small florets. You can use as much of the stems as you like (I use a lot of the stems, removing only the center core, which is quite tough & bitter).
4 cups veggie or chicken broth
1 cup cream *take it out of the fridge as soon as you start the cooking process, so that it’s not cold. This will prevent the cream from curdling as it is added to the soup.
1 cup grated parmesan
2 small salmon filets
2 tbsp ea dijon mustard & honey
The Process
Preheat the oven to 400F
Rinse the salmon & pat dry. Sprinkle with salt & pepper.
In a big bowl, mix together dijon & honey (melting honey if needed).
Add the salmon, coat well, & let sit while the veggies are roasting.
Place onions & garlic on a roasting pan, lightly coating with olive oil, salt & pepper. Roast for 20 minutes or until soft & slightly browned, stirring halfway through the roasting time.
Repeat the same process with the cauliflower.
*If you roast all of this at the same time in the oven, you may need to increase roasting time to 25 minutes. Check after 20 minutes. Soft onions & cauliflower are good!
Once the veggies are done roasting , add them to a soup pot, plus 1/2 of the broth, letting everything combine for about 10 minutes.
Now, wrap the salmon loosely in foil, place on the roasting pan & roast for about 20 minutes, or until it flakes easily with a fork.
Using a food processor OR an immersion blender, blend the veggies & broth until smooth. Return back to the pot & add the remaining broth. Keep on low heat.
In a small saucepan heat up the cream on low heat, slowly whisking. Once it is warmed through, immediately take it off the heat, and stir in the cheese. Stir until is is blended well.
Add the cream to the soup, slowly stirring it in.
Serve the soup with the salmon broken up into small chunks & sprinkled on top of the soup.
Enjoy!

Cream of Celery, Potato & Spinach Soup
Don’t be fooled by the healthy color of this soup - it’s extremely, creamily delicious!
I relied upon my usual technique of roasting everything first to get a wonderful, carmelized flavor. I also kept some of the potatoes out of the blending process, adding them in later, so the creamy soup had some chunkiness to it.
The veggies themselvs are quite creamy when blended. Only a small amount of actual cream needs to be added to achieve the desired effect.
This simple recipe takes about an hour from start to finish, It makes 6 meal sized servings.
Ingredients
3 large onions, sliced
1/2 head of garlic, kept as a whole if possible, with the top of each love chopped off
6 stems celery, whole
4 medium sized potatoes, peeled & chopped into 2 inch cubes
3 bunches spinach, washed and coarsely chopped (or 1 big bag)
1 tsp ea oregano & thyme
4 cups veggie broth
1 cup cream
1/2 cup grated parmesan, plus more for serving
The Process
Preheat oven to 400 as you get the veggies washed, chopped, & ready.
Set out the cream, so it has time to reach room temperature.
In batches, roast the onions, garlic, celery & potatoes on roasting pans. Everything needs to have a drizzle of oil, salt & pepper, & be lightly coated. The garlic just needs a drizzle on top of the 1/2 head. Ensure that the veggies are not touching each other.
Each pan of veggies can roast for approx 20 minutes each, or until slightly browned & softened. Stir 1/2 way through the roasting time to check the progress. The garlic may need a little more time.
Once everything is roasted, reserve about 1 1/2 cups of the potatoes, setting them aside. With everything else, coarsely chop & then add to the soup pot with the spinach & 1/2 the broth, simmering for about 10 minutes until the flavours combine.
Remove from heat, and either with a food processor or immersion blender, puree to a creamy texture.
Return everything to soup pot, adding reserved potatoes & the rest of the broth.
In a separate, small saucepan, slowly heat up the cream on low heat, whisking to make sure it doesn’t burn.
Once it’s heated through, remove from heat & stir in the cheese. Whisk until everything is blended.
Slowly pour the cream into the soup pot, stirring continuously. Add more broth as desired.
Sprinkle with more parmesan & enjoy!

Buddha Bowl
The name of these nutritious bowls is originally derived from the tradition where buddhist monks pass through the local village each day with their ‘begging bowl’, only allowed to eat whatever food is given.
Buddha Bowls, as we know them now, are a little more fancy ;)
The typical nutritious mix includes a bean & a grain - which together make a full protein - plus veggies & topped with a healthy dressing, all together in 1 bowl.
The type of bean, grain, veggie & dressing can vary, so have fun & experiment with colour, flavour, & texture!
In this version, which I made last week, I used quinoa, mung beans, broccoli, butternut squash, red onion, whole garlic cloves, avocado & fresh basil.
The Ginger Dressing woke up the flavour of the roasted veggies perfectly!
Ingredients & Process
Grain: 1 cup rinsed quinoa of any kind (pick out any discolored ones) & 1 3/4 cups water or broth.
Process: Once it all comes to a boil in a small saucepan, turn down to a simmer for 15 minutes or until tender. Remove from heat, remove any excess water, & add a tiny bit of butter if you like. Let sit for 10 minutes, then bluff with a fork.
Bean: 1 cup rinsed mung beans & 3 cups of water or broth.
Process: Once again, bring to a boil, then turn down to a simmer for 25-30 minutes, until tender. Remove from heat, remove any excess water & let sit for at least 10 minutes.
Veggies:
Once all are chopped as I describe below, drizzle with olive oil & gently toss with salt & pepper.
Roast in a roasting pan at 400F.
Suggested roasting times for each veggie are listed, but keep your eyes on them so that you can roast to your desired taste.
2 large red onions, peeled & sliced. Roasting time: 20 minutes
1 head of garlic, whole, with the top of the cloves chopped off. Roasting time 40 minutes - once the garlic is done remove the outer peelings
1 large head of broccoli, stem peeled, chopped into small florets. Roasting time: 25 minutes
1 small butternut squash, seeds & pulp removed, peeled & chopped into small cubes. Roasting time: 25 minutes
Additional Raw Veggies: sliced avocado & fresh, washed basil leaves
Ginger Dressing:
2 tbsp fresh grated ginger
1 clove garlic (you can use 1 clove of the roasted garlic, which is more mild, or a raw one for more intensity)
2 tbsp soy sauce
1 tsp dijon mustard
1/4 cup rice vinegar
1/3 cup olive oil
Process: I put all the ingredients in a sealed jar, shook it, and done!
Final Assembly:
Scoop a small amount of each ingredient into your bowl, keeping everything separate for maximim prettiness.
Drizzle with dressing & enjoy!
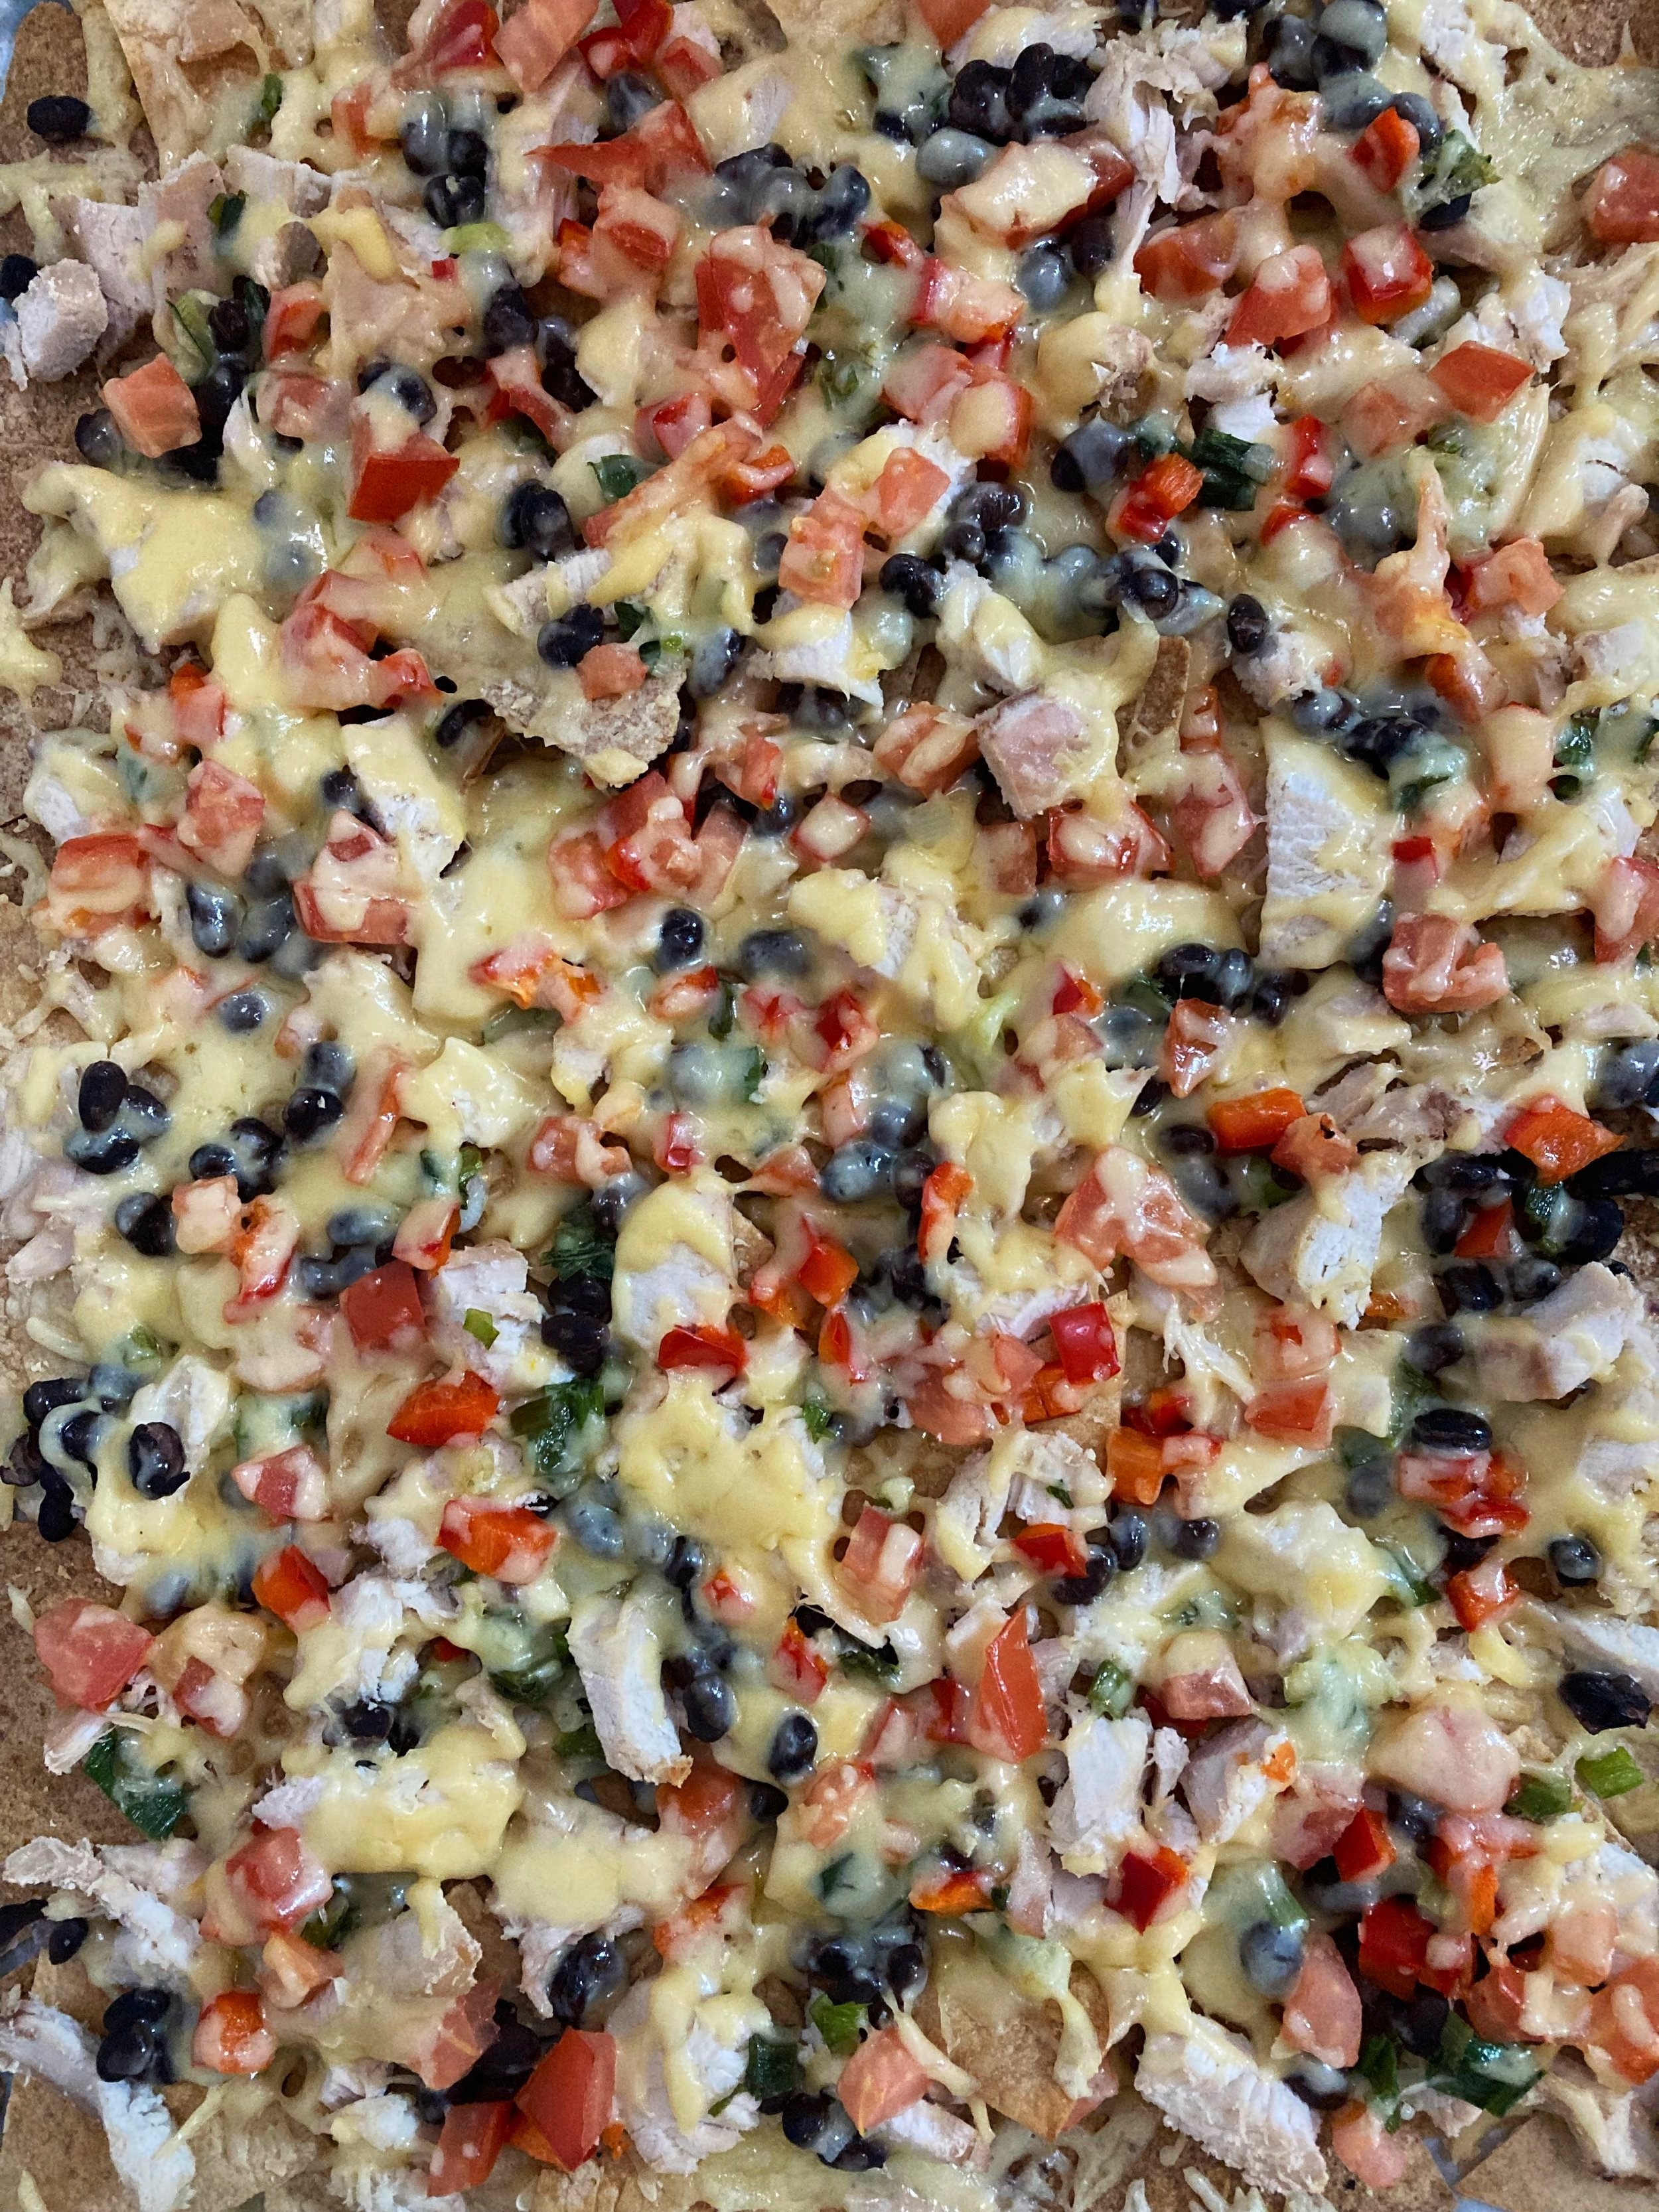
Healthi(er) Nachos
Hidden below the veggies, shredded chicken & cheese, are lightly baked whole wheat tortillas, cut into triangles. They make the perfect nachos, with waaaay less salt & oil.
I made this for the gang to munch on as we watched football (soccer for all those in North America). It was a hit.
I served it with smashed avocado dip and pico de gallo - the recipe for which is right below this one.
All the above took about just over an hour from start to finish, and kept 5 of us very happy.
Ingredients
For the nachos:
1 package whole wheat tortillas (approx 10 tortillas), cut into triangles
olive oil
salt & pepper
Toppings:
1 small red pepper, chopped into small cubes
1 medium tomato, seeds removed, chopped into small cubes
1 1/2 cups black beans, rinsed
2 green onions, finely chopped
1 cooked chicken breast shredded or cubed
1 cup each of 2 types of your favourite cheese, grated
Other topping options: red onion, black olives, jalapeño pepper.
Can also be served with sour cream.
The Process
Preheat oven to 350F
Arrange the cut tortilla triangles on a large baking sheet so that they’re not overlapping. Very lightly brush on both sides with olive oil, sprinking with salt & pepper.
Bake for 10 minutes maximum - checking at about 8 minutes. Because we’re going to put these in the oven again, once the toppings are on, we only want them lightly toasted.
When the tortillas are done, arrange in a slightly overlapping fashion on the same baking tray.
Sprinkle on the toppings: peppers, tomatoes, onion, chicken, beans, & whatever other toppings you like. Sprinkle the cheeses on top.
Put back in the oven & bake for 10-15 minutes, until the cheese is meted to your taste.
I served it ‘as is’, right on the baking sheet, with wooden coasters or towels underneath, and small serving plates for all the guests.
Enjoy!

Pico de Gallo
Because some people are very sensitive to the taste, I made this without cilantro (personally, I love it, but this was absolutely delicious without it). I also made it without jalepeño, because, again, I was unsure about the heat tolerance of my guests. This is the thing about pico de gallo - you can add or subtract ingredients to your taste! The freshness of the veggies makes it taste wonderful no matter what. The secret is to chop everything very small, allowing the flavours to mix really well.
Tastes best 1 hour after making.
Ingredients
1 tomato, seeds removed
1/2 red pepper
1 small red onion
1 green onion
3 tbsp lime juice
1/2 tsp sea salt
Optional added ingredients: 1 small seeded jalepeño, cilantro
The Process
Finely chop all the veggies, & combine in a bowl, along with lime juice & salt.
Let sit 1 hour.
Enjoy!

Mulligatawny Soup
Veggies, Protein, Fiber, Flavor - this hearty soup has it all!
I will be making this again & again for years to come - it’s as nutritious as it is delicious.
Makes 6 large meal-sized servings
Ingredients
Olive oil or butter to cook
3 medium sized onions, finely chopped
4 garlic cloves minced
2 tablespoons of ginger minced
3 sticks of celery, thinly chopped - reserving the leaves for garnish
1 medium-large carrot, thinly chopped
1 large apple, peeled & thinly chopped
1 cup peas. If using raw peas, add them with the carrots, celery, & apples. If using frozen or canned, add with the spinach, tomato & lentils.
Spices: 1 tsp tumeric, 1/2 tsp cumin, cinnamon, paprika, 1/4 tsp pepper.
1 large tomato
3 tbsp tomato paste
1 bunch spinach
3 cups cooked lentils
3 cups veggie broth
1 can (1 1/2 cups) coconut milk (add both the cream & the water if they are separated)
Optional add-ins: cooked shredded chicken breast & rice are often added in after the coconut milk.
You may need to add more broth and reheat if you are doing this.
Serve with: top with toasted cashews & the chopped leaves from the celery. Naan bread is always a good idea.
The Process
Slowly cook the onion (using a small glug of olive oil or 1 tbsp butter) on low heat as you continue to prep everything else, making sure it does not brown or stick. Gently saute for 10 minutes.
Add the garlic, ginger, carrots & celery, apple & peas (if they are raw) AND just a splash of broth, to make sure nothing sticks. Gently saute, letting everything sweat for about 10 minutes
Gently stir in the spices. Let the flavors combine for another 5 minutes.
Add the tomato, tomato paste, spinach, lentils, peas (if they are frozen or canned) & the remaining broth. Bring to a boil & then immediately turn down to a simmer for 40 minutes, or until the carrots are soft.
When the soup is cooked to your liking, take it off the heat and lightly blend 1/3 to 1/2 of the soup. Choose the texture & consistency that feels best for you.
Gently stir the coconut milk into the complete soup mixture until it is completely combined. At this point you can also add in any options, such as chicken or rice, reheating if necessary.
Garnish with cashews & chopped celery leaves or parsely, and enjoy!
Last 5 days in the refrigerator, or 3 months in the freezer.

Veggie Tomato Soup
Wholesome, yummy, healthy, veggie comfort food.
Makes 6 servings in about an hour from start to finish.
I give details about how to make this soup using canned or frozen veggies, or fresh.
Using fresh veggies does take a little more time & preparation, but it is SO worth it -
flavor & nutrient levels are much higher!
Either way, this soup is very healthy & delicious. Enjoy!
Ingredients
Olive oil
2 large onions, peeled & chopped into bite-sized pieces
3 cloves garlic, peeled & minced
1 cup chopped celery
1 cup chopped carrots
1 cup peas - either canned, frozen or raw (if using raw, which taste much better IMHO, they need to be added sooner)
2 potatoes, peeled & chopped into 1 inch cubes
1 cup corn, either canned or frozen, OR 1 fresh cob ( if using the fresh cob , which tastes much better IMHO, it needs to be boiled for 5 minutes separately & then the kernels sliced off. The extra step is worth it.)
1-2 cups veggie broth - depending if you want it to have more of a soup quality or more of a stew quality
1 tsp ea of dried oregano & parsley
1 cup green beans, measured after the ends are snapped off & they are cut into 1 inch pieces
2 cups of canned diced tomatoes & their juices OR 4 large tomatoes - this means you will need to blanche & peel them ahead of time, & add them to the soup earlier than if using canned. It’s an extra step, but worth it.
The Process
*If using fresh tomatoes: Bring a pot of water to boil. Prepare an ice bath (a large bowl of cold water & ice cubes). Add the tomatoes to the boiling water & leave them for 45 seconds or so - you will see them start to peel. Immediately submerge them in the ice bath to stop them from continuing to cook. Once they are cooled, peel off the outer skin & discard. Dice the tomatoes & set aside.
*If you are using a fresh corn cob, boil it, covered in water, a separate pot , for about 5 minutes. Let it cool & then slice off the kernels & set them aside.
In a large soup pot, saute the onions in the olive oil for 15 minutes at low heat, stirring occasionally to avoid sticking or browning. Add garlic, celery, & carrot, turning heat to low-medium. Saute for another 10 minutes.
Add to the soup pot the potatoes, the fresh tomatoes if you’re using them, 1 cup of the veggie broth, & the dried herbs. Simmer for 10 minutes.
If you’re using raw peas, add them along with the green beans & the canned tomatoes, if you are using them. Adjust heat so it continues to simmer gently for another 10 minutes.
If you’re using canned peas, add them now, along with the corn, & simmer for another 10 minutes. Add more broth to create the consistency that you like (more stewy, or more soupy…). Let the flavours blend.
I recommend serving with a crusty bread, to soak up the broth.
Enjoy!

Creamy Lemony Broccoli
A healthy substitute for mac’n’cheese!
The slow roasted onions & well-cooked broccoli make this a chewy, creamy eating experience
- not necessarily what we usually associate with broccoli.
This recipe takes just over an hour from start to finish & makes 8 servings as a side, or 5 servings as a main dish.
Ingredients
Olive oil
1 large onion, chopped into small pieces
2 cloves garlic, peeled & minced
1 large head broccoli, stems & stalk peeled and chopped into bite-sized pieces, florets chopped small, close to the floret itself. Set the florets aside from the stalk.
1 cup corn - my preference, for maximum flavour, is to use an ear of corn - boil it for 5 minutes, and then slice off the kernels, but of course, canned or frozen also works.
2 cups vegetable stock
2 tbsp flour
1/2 cup cream
3/4 cup of your favourite white cheese, grated
2 tbsp lemon zest (roughly from 1 lemon)
The Process
Get the onions started first, letting them cook while you chop & prep all your other veggies. The slow carmelization adds more creaminess & richness to the final product! In a large saucepan, place the onion & olive oil on low heat, allwing allow them to slowly carmelize. You don’t want them to brown or stick. They can slowly cook for at least 20 minutes (up to 30 minutes) while you get everything else ready. Add the garlic after 15 minutes or so.
Once you have the broccoli chopped, with the florets set aside, add the chopped stalk & stems to the saucepan with the onions, and cook on low-medium heat for 10 minutes, covered, letting them soften, & stirring occasionally, adding 1/2 cup of veggie stock, making sure things don’t stick.
Once the broccoli stems & stalks are getting soft, gently mix in the florets & corn. Cook on low-med heat for another 10 minutes, adding more stock if necessary to prevent sticking.
Meanwhile, in a smaller pot, bring the rest of the vegetable stock to a boil, then turn down to a simmer. Add the flour slowly, whisking it in gradually so it doesn’t clump. Once the flour is all whisked in, turn the heat to very low & slowly pour in cream that has been pre-heated 1 minute in the microwave, or is at least room temperature (not cold). Turn off heat & gently stir in the grated cheese & lemon zest.
Carefully stir the sauce into the veggies, mixing gently until everything is combined.
Enjoy!
Keeps well in the fridge for up to 5 days.

Thai Rainbow Veggie Salad
This easy-to-make salad is extremely rich in flavor AND nutrition.
The assortment of colored veggies means that there is a wide variety of micronutrients, antioxidants, & prebiotics - perfect food for our gut microbiome.
The combination of chick peas & cashews creates a complete protein.
The tangy peanut dressing - with ginger & garlic - adds even more health benefits.
Enjoy.
Ingredients
Salad ingredients
1 small head broccoli, cut into tiny florets
1/2 of a small head of purple cabbage, chopped into small pieces
2 carrots, cut into small pieces
1 cup basil leaves, washed & coarsely chopped
1 medium red pepper, cut into small pieces
1 cup chick peas (with the cashews, this makes a complete protein!)
1/2 cup toasted cashews, coarsely chopped
Thai Peanut Dressing
1/4 cup natural peanut butter
4 tbsp soy sauce
2 tbsp honey
2 tbsp rice vinegar
2 tbsp sesame oil
2 tbsp minced ginger
2 cloves minced garlic
Squirt 2 tbsp lemon or lime juice on top of salad just before serving.
The Process
In a large salad bowl, combine all of the salad ingredients.
In a separate small bowl, combine all the dressing ingredients & stir well.
Thin dressing to your desired consistency with warm water.
Start by stirring in 1/2 of the dressing into the veggies. Then add more dressing to your desired taste.
Squirt lemon or lime juice on top just before serving.
Enjoy!

Green Lentil & Veggie Salad
Full of protein, antioxidants, essential vitamins & minerals, fiber, & delicious flavour!
This recipe makes enough for 6 generous side servings or small meals.
I recommend serving it warm.
Ingredients
1 cup of green lentils, rinsed
3 cups water
1 bunch/small bag arugula, rinsed, with excess water squeezed out, & coarsely chopped
1 bunch asparagus, tough ends snapped off, chopped into 2 inch pieces
4 green onions, chopped into 2 inch pieces
1 1/2 cups peas, canned or if using fresh, steam them for 8-10 minutes until cooked but not mushy
1 small jar sundried tomatoes, excess oil rinsed off, coarsely chopped (about 1 1/2 cups loosely packed)
3/4 cup pistachios, coarsely chopped
olive oil
salt & pepper
3 tbsp ea lemon juice & honey softened
optional (but recommended!): freshly grated parmessan
The Process
Preheat the oven to 400F
Add rinsed lentils & water into a saucepan. Bring to a boil, then turn heat down to a simmer & cook for 20 minutes, or until lentils are ‘al dente’ (not mushy).
Place the chopped arugula in a big bowl that can be covered.
Once the lentils are done, drain any excess water & add them to the salad bowl. Allow the heat of the lentils (and the other veggies as you add them later) to naturally wilt the arugula.
Once the oven is ready, place the chopped asparagus & green onions on a roasting tray, drizzled with olive oil, salt & pepper. Toss lightly, keeping the veggies separate. Roast for 10 minutes, or until lightly browned. Add them to the salad bowl, along with the peas (canned peas can be added directly. Fresh peas need to be steamed first) & the chopped sundried tomatoes & pistachios.
Lightly toss it all together with the lemon juice & honey.
If you wish, top with a sprinkle of freshly grated parmessan, & enjoy! I recommend serving this warm.

Roasted Broccoli, Asparagus & Quinoa & Chickpea Salad
This salad is very yummy warm or cold. It has a wonderful mix of flavour & texture.
The quinoa, chickpeas & pistachos together create a solid source of protein, & the green veggies provide tons of antioxidants & essential vitamins & minerals.
But you won’t be thinking about that as you taste it - it’s so delicious.
This takes about 45 minutes to make, and serves 4 as a main dish, or 6 as a side. Can be refrigerated for 2 days.
Ingredients
Olive oil
Salt & pepper
1 medium head broccoli, chopped into small florets. If you are using the stem (I love it!) peel & chop into bite-sized pieces
1 bunch asparagus, white parts removed, chopped into 2 inch pieces
3 green onions, chopped into 1 inch pieces - use green & white parts
1 1/2 cups cooked or canned chickpeas, rinsed
1 cup quinoa
2 cups water
1 1/2 cups chopped feta cheese
1 cup dried cranberries
1 cup pistachios, coarsely chopped
1/4 cup lemon juice
The Process
Preheat oven to 375
Place broccoli & asparagus on a roasting tray, keeping them separate if possible.
Drizzle olive oil, salt & pepper on top. Gently toss to coat everything lightly & evenly.
Roast for 10-20 minutes or until slightly browned. Check on them after 10 minutes - you may want to remove the asparagus before the broccoli.
Meanwhile, rinse the quinoa in water, then add the quinoa & the 2 cups of water to a small saucepan. Bring to a boil. Then simmer for 20 minutes, or until all the liquid has been absorbed. Remove from heat & either pour in a small glug of olive oil or 1 tbsp butter. Stir it in & set aside, covered.
Once the broccoli & asparagus are done, put them in a large salad bowl & set aside. Then put the green onion & chickpeas on the roasting tray. The green onions can get lightly coated in olive oil, salt & pepper, but the chickpeas need nothing. Roast for about 10 minutes, until the onions are slightly browned.
Gently combine the broccoli, asparagus, green onion, chickpeas, quinoa, pistachos, feta & cranberries together. Drizzle in the lemon juice & a small glug of olive oil. Gently mix & enjoy!

Salmon Veggie Coconut Stew
Roast the cauliflower & the salmon in the oven, while at the same time cooking the other veggies & broth in a large saucepan. Then combine it all together at the end. This is more time-saving, AND you get a beautiful roasted flavour in the cauliflower & salmon.
I added only a little bit of coconut milk for a subtle flavour,
but feel free to add more coconut milk for a more creamy, coconut-y taste.
Combined with the rest of the ingredients, especially the fresh basil, this is a wonderfully flavourful dish.
Takes about an hour from start to finish, & makes 6 servings.
Ingredients
olive oil for cooking
2 medium onions, chopped
4 garlic cloves, minced
1/2 medium cauliflower (about 4 cups), chopped into bite-sized pieces
1 small eggplant, chopped into bite-sized pieces
1 medium salmon filet, skin removed (approx 1 pound)
3 cups canned stewed tomatoes & juices, tomatoes roughly chopped
11/2 cups coconut milk
1 1/2 cups fresh basil, washed
Serve with cooked, whole grain rice
The Process
Preheat the oven to 375
In a large, deep saucepan, heat 11/2 tbsp olive oil on low heat & add the onions. Saute on low heat for up to 20 minutes to create a lovely carmelization process, stirring often to avoid sticking or browning.
Meanwhile, lightly coat the salmon & cauliflower in olive oil, salt & pepper.
In a large roasting tray, place the salmon on 1 side, with parchment paper underneath, and the chopped cauliflower on the other side. (You could also use 2 small roasting trays) Roast for 20 - 30 minutes, stirring the cauliflower halfway through. When the salmon is flaky & the cauliflower is slightly browned, they are done! Take out of the oven & set them aside. Roughly chop the salmon into bite-sized chunks.
Now, back to the saucepan: after the onions have been slowly carmelizing for about 20 minutes, add the garlic to the saucepan & saute to make sure it doesn’t stick.
Move the onion to the edges of the pan & add the eggplant, possibly adding a touch more olive oil to ensure that they don’t stick. Let them brown, sauteeing from time to time to ensure no sticking, for 15 minutes.
Add the chopped, stewed tomatoes & coconut milk, and bring to a simmer, stirring often. Let simmer for 10 minutes.
Add the salmon & cauliflower to the saucepan, and gently stir in the basil, making sure that you don’t crush the salmon. Simmer for another 10 minutes.
Serve with whole grain rice.
Enjoy!

Cream of Cauliflower Soup
Roasting the onions, garlic & cauliflower makes a huge impact on the taste of this VERY delicious soup.
This soup takes about an hour from start to finish & makes 6 meal-sized servings.
Ingredients
Olive oil
salt & pepper
3 large onions, thinly sliced
5 cloves garlic (I like lots of garlic! Feel free to use less), peeled & smashed
1 large head of cauliflower (or 2 small), chopped into small florets. You can use as much of the stems as you like (I use a lot of the stems, removing only the center core, which is quite tough & bitter).
2-3 cups veggie or chicken broth
1 carrot, thinly sliced & cut into 1/2’s or 1/4’s
1 cup peas, canned, frozen, or fresh
2 tbsp butter
1 tbsp flour
1 cup cream *take it out of the fridge as soon as you start the cooking process, so that it is not cold. This will prevent the cream from curdling as it is added to the soup.
1 cup grated cheese - I recommend a sharp cheddar
Croutons for topping (optional)
The Process
Preheat the oven to 400F
Place onions & garlic on a roasting rack, lightly coating with olive oil, salt & pepper. Roast for 20 minutes or until soft & slightly browned, stirring halfway through the roasting time.
Repeat the same process with the cauliflower.
*If you roast all of this at the same time in the oven, you may need to increase roasting time to 25 minutes. Check after 20 minutes. Soft onions & cauliflower is good!
Meanwhile, boil the carrots in just enough water to cover them. If the peas are fresh, they will need to be added with at the same time as the carrots. If they are frozen or canned, they can be added when the carrots are almost tender. Once everything is just tender but not mushy, take off the heat. Keep the liquid on reserve.
Place 1/2 of all the roasted vegetables in a food processor OR in a soup pot if you are using an immersion blender, adding 1 cup broth. Blend until smooth.
Add all the veggies - the blended ones, the rest of the roasted ones, and the peas & carrots to the soup pot. Add 1-2 cups more of the broth, keeping in mind that we are going to add 1 cup of cream, as you find your desired soup consistency. Keep the soup at a low simmer.
In a small saucepan, melt the butter on low-med heat. Slowly stir in the flour, and whisk continuously, until it forms a roux. Slowly whisk in the cream. Turn the heat up, and once it comes close to boiling, immediately take it off the heat, and stir in the cheese.
Slowly add the cream sauce to the soup. If you need more liquid, you can add more broth or the reserved liquid from the carrots & peas.
Serve with croutons & enjoy!

Cream of Tomato & Spinach Soup
This soup is creamy delicious & also very healthy.
Using fresh tomatoes is not much more work in my opinion, and they add a much richer taste than canned.
Canned DOES work really well also, so feel free to use them if you’re pressed for time.
Using fresh tomatoes, this takes an hour from start to finish. Makes 6 servings.
Ingredients
Soupy Part:
1 1/2 tbsp butter
2 cups chopped onions
5 cloves garlic, peeled, chopped, & minced
salt & pepper to taste
1 tsp dried thyme & oregano
5 cups tomatoes *use whole canned tomatoes OR see below how to use fresh tomatoes, peeling & de-seeding them
1/3 cup tomato paste (a small can)
2 1/2 cups of chicken or veggie broth
3 cups fresh spinach, washed, chopped (1 small bag or bunch)
Creamy Part:
2 tbsp butter
1/4 cup flour
1 cup cream
The Process
Using fresh tomatoes:
Wash tomatoes, remove any stickers & stems. Make an X on the bottom of the tomato. This will make peeling easier.
Have a bowl of ice water closeby.
Boil water in a bog pot. Place tomatoes in the boiling water, and let them sit for 30 - 45 seconds, once you see that the skin is starting to peel.
Immediately put them in the ice water, & let sit until cool.
It should be quite easy to remove the skins at this point with your hands, although you can use a parking knife if you need.
Then slice the tomatoes horizontally. This makes it easier to remove the seeds, using a spoon or knife to gently remove them.
Then chop them up coarsely.
Now, back to the soup…
Saute the onions in the butter for at least 10 minutes at low-med heat in your soup pot, but for as long as 20 on low heat. If you have 2 big pots, you can start the onions as you boil the water for the tomatoes, as described above.
Add the garlic to the onions & saute for another 5-10 minutes.
Add the tomatoes, tomato paste, herbs, & broth. Stir in gently until combined. Bring to a boil, and then turn down heat to simmer for 30 minutes.
Add spinach and stir in until wilted.
Puree the soup in a food processor or immersion blender. Be careful if the soup is hot - only filling the food processor 1/2 way.
For the creamy part:
In a smaller saucepan, melt butter on low heat. Add flour & whisk quickly in until it’s smooth. Slowly add cream & whisk in until smooth. It should be yogurty thick.
Off the heat, slowly add the cream sauce into the soup stirring well to combine. Feel free to add more cream or broth so that it is to your desired consistency.
Serve & enjoy.
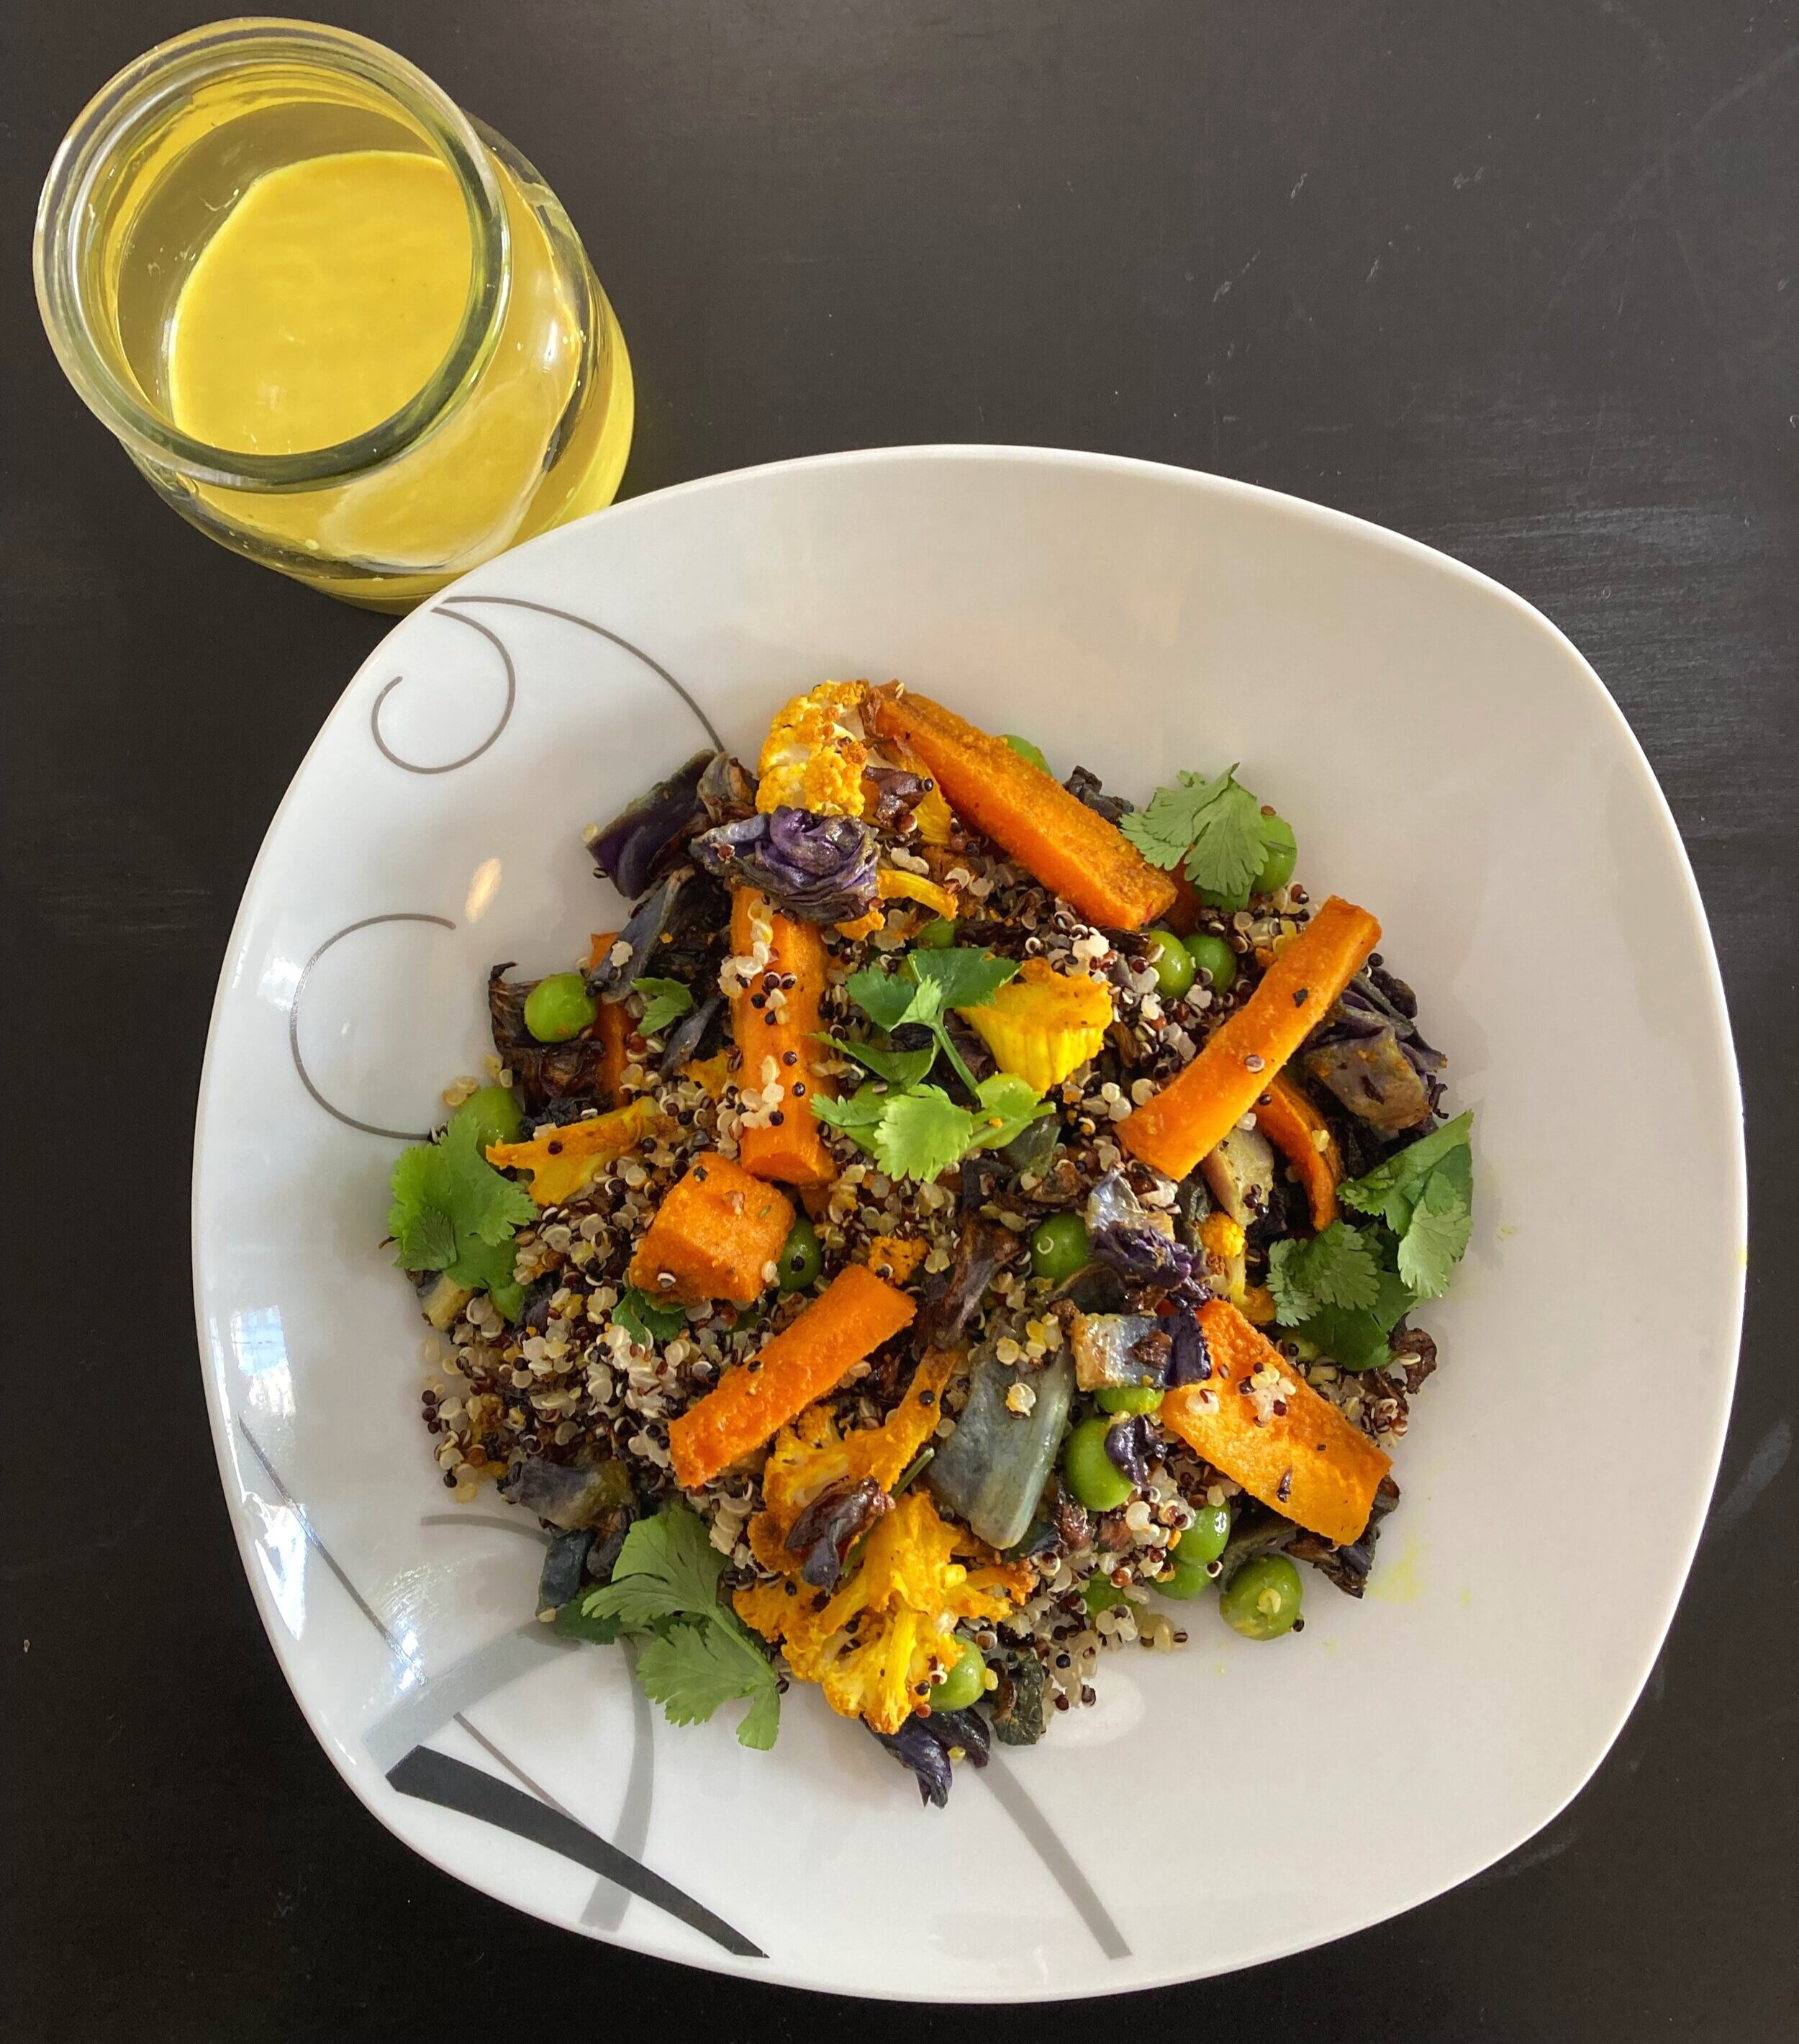
Roasted Veggie-Quinoa Warm Salad
with Tahini-Ginger Dressing
This salad is packed full of flavour, texture, & colour
AND is bursting with protein & antioxidants!
Quinoa is an almost perfect protein, & along with the peas & nuts, you are definitely getting a good amount of this very important macronutrient. For even more protein, top with fish or shrimp.
All the veggies here are superfoods, as well as the main spice, turmeric. The main component of turmeric, curcumin, has been shown to have many health benefits. It’s a powerful anti-oxidant, & anti-inflammatory, and is beneficial for the heart & brain.
Finally, the brightness of the ginger in the dressing pairs really well with richness of the roasted veggies.
This recipe makes 6 servings as a hearty side dish.
Ingredients
3 carrots, peeled & quartered, then sliced into 2 inch lengths
1 small head cauliflower, cut into small florets
1 small head purple cabbage, chopped
5 cloves garlic, peeled & coarsely chopped
1 cup peas, canned, or if using raw, steam separately for 8 minutes in a small saucepan
1/4 cup turmeric
olive oil for cooking
salt & pepper (pepper allows us to fully absorb the curcumin in tumeric)
1/2 cup of your favourite nuts (almonds, pistachios, pumpkin seeds. I used chopped Brazil nuts)
1 cup quinoa
2 cups water
1 tbsp butter (optional)
Dressing
1/4 cup runny tahini sauce (add water if needed until it is quite runny)
3 tbsp lemon juice
1 tbsp softened honey
2 tbsp minced ginger
1 minced garlic clove
1/2 tsp pepper
1/2 tsp turmeric
Fresh parsley or cilantro, chopped, for serving
The Process
Preheat the oven to 375F
Roast the nuts on a large roasting tray (no oil is necessary), for 8 minutes. When they are done, set aside & reuse tray for the rest of the veggie roasting.
Dressing:
At any free point in the cooking process, you can make the dressing & set it aside until ready to serve. Just mix together all of the dressing ingredients in a jar, and that’s it.
First set of veggie roast:
Toss the chopped carrots & cauliflower in a good glug of olive oil, turmeric, salt & pepper (use more pepper than salt). Coat thoroughly & place on a roasting tray, with as much space between the veggies as possible. Roast on 2 trays if necessary. Roast for 20-30 minutes, turning 1/2 way so they are evenly & lightly browned on all sides.
Cook the quinoa while the veggies are roasting:
In a saucepan, rinse the quinoa in water. Stir it around & then drain. Then add the 2 cups of water and bring to a boil - turning the heat down immediately once it does boil. Cook for 15 minutes. Once it is done, & all the liquid is absorbed, remove from heat. As an option you can drop in 1 tbsp of butter or olive oil, then cover & let sit until everything else is ready.
2nd set of veggie roast:
Mix the cabbage & garlic in a glug of olive oil, along with salt 7 pepper. Once the carrots & veggies are done, put them aside in a bowl, and cover. Use the same roasting tray for the cabbage & garlic. Roast for 20 minutes, stirring 1/2 way through, so everything browns lightly & evenly.
Assembly:
I assembled everything in a casserole dish, so things weren’t too mixed up, but that is totally up to you. I put in the quinoa first, then the roasted veggies, then the previously steamed or canned peas, then topped with the nuts. Then I turned the oven down to 250 & let everything heat through just a little bit more before serving.
Top generously with dressing and fresh cilantro or parsely (optional) and serve warm.

Veggie-Cashew Chicken
The sauce is really the thing - & the cashews.
Feel free to be creative with what veggies you want to add to the mix.
For a pure veggie version, omit the chicken, only make 1/2 of the sauce and you are good to go.
The pea & cashew combo provides good protein in its own right.
This takes about 90 minutes start to finish, including letting the chicken marinate for 30 minutes.
Makes about 6 servings
Ingredients
Sauce
2 tbsp cornstarch
3/4 cup white wine
1/4 cup soy sauce
1/4 cup fish sauce
2 tbsp sesame oil
4 cloves minced garlic
2 Chicken breasts or 3 thighs
2 medium onions, chopped into bite-sized pieces
1 medium head broccoli, chopped into small florets. The stem can be peeled & chopped into bite-sized pieces
1 small red pepper & 1 small green pepper, diced
1 small bunch/bag spinach, washed & coarsely chopped
1 cup green peas, canned or if using fresh, steam for 10 minutes separately.
1 1/2 cups toasted cashews (if using raw, toast in the oven at 375F for 8-10 minutes). I chopped mine up in 1/2’s.
1 1/2 cups raw brown rice, rinsed
1 tbsp butter
The Process
Start with the sauce: mix the cornstarch & wine together, stirring until there are no lumps. Then add all the rest of the sauce ingredients. Take 1/2 of the sauce and marinate the chicken in it for 30 minutes in a bowl, in the fridge. Set aside the other 1/2 of the sauce for later.
While the chicken is marinating, do something else. Get the table ready, stretch, phone the friend you have been meaning to connect with.
After 30 minutes, cook the chicken on medium heat, adding a bit of olive oil, in a large, deep pan. Cook for 10-12 minutes on each side, or until the chicken is no longer pink inside.
While the ckicken is cooking, you can wash, chop up & prepare all the veggies, and get the rice going.
My rice cooking method: After rinsing the rice in cold water & draining, I cook the rice in at least 5 cups water, bringing it all to boil, and then turning the heat down slightly to prevent overboiling. After 20 minutes, I check the rice every 5 minutes for done-ness. It’s usually done after about 30 minutes, at which point I drain all the excess water, add 1 tbsp butter, cover, and let it sit while everything else gets ready. This method takes out the element of needing to be exact with the water/rice ratios, or ending up with soggy rice. It comes out perfectly fluffy every time for me.
Once the chicken is done, set it aside and rinse out the pan.
Add 1 tbsp olive oil to the pan, and add the onions. Saute over low-med heat for 10-15 minutes.
Add the broccoli and saute for 5 minutes.
Add the rest of the reserved sauce and the toasted cashews. Let everything saute 5 minutes more, now over medium heat.
Add the peppers, and saute for 5 minutes.
Meanwhile, chop up the chicken into bite-sized pieces.
Add the spinach & gently stir in until it’s wilted.
Finally, add the canned or previously steamed peas, and the chicken to the mix, and gently combine. Let cook another 5 minutes, until everything feels well combined.
Serve warm with rice.

Sweet & Savoury Butternut Squash Soup
This soup is as delicious as it is easy to make!
I love roasting the squash in the oven first, giving it more of a carmelized sweet taste, then adding it to the soup pot with everything else, and blending it all together at the end.
This naturally creamy soup pairs well with a protein-infused salad or sandwich for a complete meal.
I recomend getting the squash started in the oven first thing, then the onions started in the soup pot, and then you can prepare all the other veggies while these 2 do their magic.
This takes about an hour from start to finish with very little hands on time.
Makes 8 servings, & lasts 5 days in the fridge, or 6 months in the freezer.
Ingredients
1 large or 2 small butternut squashes (I used 2 small, as smaller ones tend to have more sweetness)
Olive oil
salt & pepper
2 large onions, roughly chopped
3 cloves garlic, peeled & minced
1 large carrot thinly chopped
2 sticks celery, thinly chopped
1 apple, peeled, cored, & chopped into small pieces
3 cups veggie broth (possibly adding more, depending on your desired consistency)
1 heaping tbsp honey
The Process
Preheat the oven to 375F
Cut the squash in half, remove the seeds, and lightly coat all over in olive oil. Place on a baking sheet, face down, and roast for 40-50 minutes. Don’t worry if the skin gets brown. They are done when you can easily pierce with a fork. When done, set them aside to cool.
While the squash is roasting, get everything else ready. Slowly saute the onions on low heat in the soup pot, with a little bit of olive oil, and salt & pepper. I like letting them carmelize for up to 20 minutes at a very low heat, so they don’t brown or stick, but you could let them saute for less time (10 minutes), at a slightly higher heat, just keeping more of an eye on them.
Prepare the garlic, carrot & celery, & apple, and after the onions have been cooking for 10- 20 minutes, add these to the soup pot. Saute for 5-10 minutes.
Add 1 cup of the veggie broth, & bring to a low simmer for about 15 minutes.
When the squash has cooled, scrape out the flesh with a spoon and discard the skins. Add the squash & honey to the soup pot . Stir to combine.
Blend the soup. If you are using an immersion blender in the pot, make sure the pot is off the heat. If you are using a food processor, blend in batches, making sure to fill the bowl only 1/2 way, so that steam can escape. Return the soup to the pot.
Slowly stir in the rest of the broth, adding more or less, so it is to your desired consistency.
Serve hot, & enjoy!

Veggie-Packed Quiche
This is so delicious!
I encourage you to experiment with different veggies each time you make this.
(See below for the cauliflower-leek version!)
Using a pre-made crust is often the best way to go, if you are tight for time.
Making your own pie crust is absolutely wonderful, but it means you need to plan ahead. The dough needs to chill in the fridge for at least 3 hours, or in the freezer for 30 minutes, before baking.
The recipe I have here uses 100% whole wheat flour, which will not come out as flaky as using a 50/50 mix of white & whole wheat, but I love it so much - not just for its nutty taste, but also for the added fiber.
The pie crust needs to be partially baked beforehand with no filling (this is called ‘blind-baking’), so make sure you either have baking weights (I don’t have any) or rice or beans to fill the pie crust with (you won’t be able to use these later for cooking), plus parchment paper. This prevents the crust from pulling away from the edges, or cracking, while baking.
The pie crust is made for a 9 inch round pan.
This is best enjoyed immediately, but also lasts well in the fridge for 3 days.
Ingredients
1 frozen premade pie shell
OR
Whole wheat crust ingredients:
1 1/4 cups whole wheat flour
1/2 tsp salt
100g/7 tbsp very chilled butter, cut into small pieces
3-5 tbsp ice water
Filling ingredients
1 tbsp butter
1 large onion
1 small head broccoli, chopped into tiny florets
2 tbsp lemon juice
1 small red pepper, chopped into small pieces
1 bunch/small bag spinach, washed & chopped into small pieces
Egg mixture
6 eggs
1 cup cream
salt & pepper to taste
Toppings
1 cup of your favourite grated cheese
1/2 cup chopped prosciutto
The Process
Pie Crust
If you are using a pre-made pie crust, bake according to package directions.
If you are making your own pie crust…
Using a food processor or your hands, mix the flour & salt in a large bowl, and then add in the chilled butter pieces. Pulse with the food processor, or rub with your hands until it’s in big crumbs, but still with tiny chunks of butter (this is what creates the flakiness). Add 3 tbsp of ice cold water and pulse or knead until it forms a dough. Add more water if needed, 1/2 tbsp at a time, to a maximum of 5 tbsp total. When it is just formed into a dough, it’s ready. Form it into a disc, cover with plastic wrap, and chill in the freezer for 3 hours (or more), or in the freezer for 1/2 hour.
After chilling, take the dough out of the fridge/freezer, and preheat the oven to 350F.
On a lightly floured surface, roll the dough out with a lightly floured rolling pin. Roll it out into a 12” round.
Blind-baking the crust
Gently place the crust into the 9” pie crust pan. Gently press the pie crust in, and use any remaining remnants to patch up the top edges or any cracks.
Cover the crust with parchment paper, and fill the crust with rice or beans (you cannot use these for cooking at a later time), or baking weights. This prevents the crust from shrinking away from the edges or puffing up.
Bake for 20 minutes, or until the edges are lightly browned. Take the crust out, carefully remove rice/beans/weights and parchment paper.
*while the crust is baking, prepare the filling
Filling
In a shallow pan, melt butter over low-med heat & add onions. Saute for 10-15 minutes, making sure they don’t stick or brown.
Add broccoli & lemon juice and saute another 10 minutes.
Add the red pepper, and saute another 5-10 minutes.
Stir in spinach and saute until just wilted, and then take the veggies off the heat.
In a bowl, whisk the eggs, cream and salt & pepper until slightly frothy.
Fill the partially baked pie crust first with the veggie mixture, until the bottom is evenly and well covered (you may have extra veggie mixture to enjoy separately).
Gently pour in the egg mixture, so it fills up all the empty spaces.
Top first with the prosciutto, and then the cheese.
Bake for 30-40 minutes, until the top is slightly golden.
Let sit for 10 minutes before slicing and enjoying!

Cauliflower-leek-red pepper version!
I roasted the cauliflower at 375 for 20 minutes, stirring 1/2 way through, and the leek (white parts only) & red pepper for 12 minutes, stirring 1/2 way through. Everything else (crust, egg mixture, prosciutto, cheese) is prepared the same. So smooth - delicious!

Coleslaw
This simple slaw is VERY flavourful.
It makes a great light side dish, perfect for picnics, or when it’s just too hot to cook.
Cabbage is a miracle food, packed with antioxidants & prebiotics, such as vitamin C, A, K, potassium, magnesium, and lots of fiber. Very good food for the gut!
Takes about 30 minutes to make. Serves 8 as a side. Lasts 3 days in the fridge.
Ingredients
1 small head each of purple & green cabbage. (If you cannot find a small head of each, just use half of each head). Chop into very small bite-sized pieces, or shred (don’t use the core)
3 carrots, peeled and grated
1 cup parsely, chopped
black sesame seeds (optional)
Dressing
1 cup mayonnaise
1/4 cup dijon mustard
2 tbsp apple cider vinegar
1 tsp ea freshly ground salt & pepper
The Process
Once the veggies are all chopped & grated, place in a big bowl, along with the sesame seeds, if using.
In a separate, smaller bowl, mix together all the dressing ingredients.
Start by adding 1/2 of the dressing, & mix it in to see how coated everything is. Then, add as much of the dressing as you like, mixing thoroughly.
This tastes best if you let it chill an hour before serving, for all the flavours to blend.

Cream of Spinach Soup
A fabulous way to get your daily serving of greens!
Paired with a protein infused salad or sandwich, it’s an extremely healthy AND YUMMY meal.
This recipe makes 8 meal sized servings. Keeps in the fridge for 5 days or in the freezer for 6 months.
Ingredients
1 tbsp olive oil
2 large onions, roughly chopped
4 cloves garlic, chopped & minced
1 apple, peeled and coarsely chopped
2 medium potatoes, scrubbed and cubed
3 cups chicken or veggie stock
1 tbsp ea dried parsely & oregano
4 bunches spinach (2 large bags), washed and roughly chopped
1 1/2 cups cream - at room temperature (take out of the fridge as you start the cooking process)
The Process
Take the cream out of the fridge so it has time to get to room temperature.
The onions can be sauteed in the olive oil, in a large soup pot, for up to 30 minutes. I like to slowly carmelize for the full 30 minutes at a low temperature, while I get everything else prepared. However, you can raise the heat a little, and saute for a shorter amount of time. Either way, keep your eye out that the onion doesn’t stick or brown.
When onions are translucent, and sauteed to your liking, add the garlic & apple, and saute at a low-med heat, until the apple begins to break down (about 5 minutes). Make sure the garlic doesn’t stick.
Add the potato, and approx. 1/2 the chicken stock, until the potatoes are just covered. Bring it all to a boil, and then immediately turn the heat down to a simmer. Add spices (parsely & oregano) and simmer for 15 minutes.
Add spinach in batches, stirring it in so that it can soften, making room for more. Once all the spinach is added, add more stock until the spinach is not quite covered, and simmer for 10 minutes at low heat. Then, turn heat off.
Blend soup. If using an immersion blender in the pot, make sure it is off the element, and watch out for overheating the blender. If blending in a food processor, make sure to fill it only 1/2 way, so that as steam accumulates, it can escape. Be careful when removing the lid.
Once all the soup is well blended, return to the pot, and turn heat to low. Slowly add cream in batches. Stir it in slowly as you go, so you can make the consistency to your liking, adding more or less cream as you like.
Enjoy with a protein-infused salad or sandwich for a complete meal.
Make sure the soup has cooled to room temperature before you put the leftovers in the fridge or freezer.

Spinach-Basil-Walnut Pesto
Pesto is a great staple to have on hand. Not only is it quick & easy to make, but if you already have some waiting for you in the freezer, putting together a super flavourful meal is even quicker & easier!
This recipe makes 2 cups of pesto - which is a lot - in about 20 minutes or less.
Whatever you don’t think you will use in the next week, freeze in small portions.
*My Pesto Pasta with Shrimp & Veggies Recipe is just below!
Ingredients
1 1/2 cup basil leaves, washed
3 cups spinach, washed
6 garlic cloves, peeled and crushed
3/4 cup toasted walnuts (toast for 8-10 minutes at 375F)
1 cup grated parmesan cheese
1/2 tsp ea salt & pepper
3/4 cup olive oil
The Process
Using a food processor or immersion blender, blend all ingredients EXCEPT oil until into a paste. Stir in oil afterwards.
Tastes amazing immediately, and even better in the next days.
Enjoy!

Pesto Pasta with Shrimp & Veggies
Once the above pesto recipe is made, this very flavourful dish comes together in about 40 minutes from start to finish.
4-6 servings
Ingredients
Papardelle, or your favourite pasta, approx 1 1/2 cups dry
1 1/2 cups cherry tomatoes, halved
1 large zuchini, sliced & quartered
2 small red onions, sliced
1 cup peas
20-ish prawns, pre-cooked, thawed (if frozen), and rinsed
4 cloves garlic, peeled & minced
1 generous tbsp butter
Grated parmesan (optional, to serve)
The Process
Preheat oven to 400
If the pesto has been made ahead of time, take 1 cup of it out of the fridge or freezer to get to room temperature.
Cook pasta according to directions, until al dente. Once it is cooked, drain the excess water, gently rinse the pasta, and set aside, with a good glug of olive oil stirred in to keep it from getting sticky.
Roast the red onions 20-30 minutes, and the zuchini and cherry tomatoes for 10 each (I actually used 1/2 of my roasting tray for the onions - and then the other half for the zuchini for 10 minutes, and then the tomatoes for 10 minutes).
Meanwhile, steam the peas in a veggie steamer for 10 minutes. Remove from heat when done, to avoid overcooking.
Also meanwhile, melt 2 tbsp butter in a pan, on low-med heat, add the garlic for 2 minutes, making sure it doesn’t stick or brown. Then add the shrimp, and cook for 3 minutes per side.
When you are ready to serve, gently heat up the pasta in the pot again, adding in the pesto, stirring it in until the pasta is well coated and it’s heated through.
Plate the veggies on top of the pasta, then top with the prawns, and a sprinkle of fresh parmesan, if you like.
Enjoy!

Apple-Berry-Yogurt-Nut Loaf
Enough sweetness to be considered a healthy treat, and enough substance to be a respectable part of brunch.
This recipe makes a 5x15” loaf in about 20 minutes of prep time, and 50 minutes of cooking time.
Lasts 5 days in the fridge & freezes well.
Ingredients
2 medium eggs
1/3 cup coconut oil or butter, melted
1/3 cup honey, softened
1/2 cup greek yogurt
1tbsp vanilla extract
1 large peeled, diced apple
1 cup berries of your choice (I used a mix of blueberry, raspberry & strawberry) - fresh or frozen (do not thaw)
1 cup chopped nuts of your choice (I used a mix of walnuts, almonds & cashews)
1 1/2 cups whole wheat flour
1 tsp ea baking powder & baking soda
1/2 tsp salt
The Process
Preheat the oven to 350F and grease a 5x15 loaf pan
In a mixing bowl, whisk the eggs until a little frothy, and then add the rest of the wet ingredients: oil/butter, honey, yogurt, vanilla. Whisk until thoroughly blended.
Add the apple, berries& nuts and gently combine, so as to not crush the berries.
In a separate bowl, stir all the dry ingredients together(flour, baking powder & soda, salt), and then add to the wet ingredients. Stir in until just mixed (do not overmix or loaf gets tough).
Spread batter into greased pan and cook for 40-50 minutes (mine cooked for the full 50 minutes). Insert a toothpick and see that it comes out perfectly clean to know that it is done. If the top of the loaf is browning too quickly, cover it with foil.
Let it rest at least 15 minutes before slicing and serving.
Enjoy!

Healthy French Fries
Let’s face it: once and a while, we want french fries. It’s only human.
Let’s make them as healthy as possible, so we can enjoy them guilt free.
Potatoes get a bad rap: they are high in fiber, prebiotics, antioxidants, potassium, & magnesium.
One key is using fresh potatoes, with skins on, and baking (not frying) at home.
While potatoes have a high glycemic index, this is only when they are eaten on their own.
When they are cooked with a more healthy fat (as these are, in olive oil), or are served with protein or other low glycemic foods in a meal, the natural sugars present in potatoes do not cause the same blood sugar spike.
This recipe is extremely easy, but takes a bit of time, especially if we want them crispy, since we are baking, not frying.
Soaking the potatoes in water is key for removing some starch so they can be even crispier!
Ingredients
2lbs potatoes, washed with skins on, and cut reasonably thinly into your perfect french fry size
olive oil
salt & pepper
The Process
Once potatoes are cut, soak in cold water for 30 minutes. Use this time to prepare whatever else you are serving with the fries (or relax, if you are just sharing fries with friends!)
Preheat oven to 400f. Lightly oil a baking sheet (or 2, if you have room in your oven!)
Rinse potatoes and pat dry as best you can, to remove excess water.
Toss the potatoes lightly in olive oil, salt & pepper. Spread out on a baking sheet(s), making sure there is space between the fries. Bake for 15 minutes, and then, take the sheet(s) out and with a spatula, gently move fries a little bit, to make sure they are not sticking. Bake for another 10 minutes, or until golden brown on the bottom. Then, gently turn over and bake on the other side for another 20 minutes, or until golden brown on the bottom.
Serve immediately and enjoy!

Green & Protein Stuffed Belgian Endive
Endive can be stuffed with so many things - fruit, nuts, seafood, cheese… there are many possibilities!
Here, I wanted to create a light meal for 2, that included greens and a whole protein. Combining legumes (the cannelini beans) with nuts makes a complete protein, with all essential amino acids, making this creation filling enough to be a small meal into itself, or as a side for 4, or served as an appetiser for more. No utensils are needed to eat this! Very Yummy!
Ingredients
2-3 Belgian Endive - stems chopped off, and leaves separated, discarding any wilted, or discolored leaves. Keep torn leaves. Wash and carefully pat dry
2 Tbsp of your favourite cooking oil or butter
2-3 Shallots, very thinly sliced OR 4 green onion thinly sliced
pinch of salt & pepper
1 tsp dried or 2 tbsp fresh herbs: parsley, oregano, thyme, or your favourite combination
1 cup cannelini beans, rinsed
1 cup walnuts, coarsely chopped
3 cups arugula, stems removed, washed , with excess water shaken out, and coarsely chopped
The Process
Prepare the endive leaves as outlined above, and set aside. For leaves that are torn, too small or not ideal for stuffing, chop them up finely.
Heat the oil/butter in a large pan, add the shallots/green onions and saute over low-medium heat for 10 minutes, until translucent and soft. Add S&P, & herbs
Add the beans, nuts, and any of the endive that you chopped up, and gently saute another 8-10 minutes on low heat, careful not to crush the beans
Add the arugula and saute another 3-5 minutes maximum, until wilted. Remove from heat.
Fill the endive leaves with the mixture still warm, sprinkle with dried or fresh herbs to garnish, and serve immediately!
Enjoy!

Creamy Broccoli & Spinach Soup
I roasted almost all the ingredients in this soup, bringing out the natural sweetness & richness of the veggies.
Plus, it’s very simple to do. This takes about an hour and 15 minutes from start to finish, with very little hands on time.
Makes 6 large servings. Lasts in the fridge for up to 5 days, and freezes well.
Ingredients
Olive oil
Salt & pepper
2 large onions, outer layer removed & sliced
4 large cloves garlic, peeled and smashed
1 large bunch of broccoli or 2 small, washed & cut into small florets
1 bunch spinach, washed and coarsely chopped
4 cups of your favourite broth (mine is miso)
2 tbsp butter
3 tbsp flour (I used whole wheat flour)
1/2 cup cream, slightly prewarmed in the microwave or on the stovetop
Serving options: grated cheese, bread
The Process
Preheat the oven to 400F
Lightly coat the onions & garlic with olive oil, salt & pepper, place spaced out on a baking sheet, and roast for 20-25 minutes minutes, or until everything is tender & lightly browned on the bottom (you may want to remove garlic a bit earlier than the onions). Repeat the same process with the broccoli.
Meanwhile, in a large soup pot, melt the butter on low heat. Once is it just melted, add the flour and whisk together, gradually blending all the flour in. Slowly add in the broth - approx 1 cup at a time, blending everything in before adding more, until all the broth is mixed in.
Once the veggies are roasted, place them all in the pot, with the broth, along with the spinach. Bring to a simmer, gently stir everything together until the spinach is completely wilted, and then remove from heat.
Blend the soup with an immersion blender, or in a food processor in batches. Don’t fill the food processor to much, and allow steam from the soup to escape. Blend to your desired texture - I prefer a little bit chunky, but more pureed is also lovely.
Return soup to the pot, slowly pour in the cream, and gently mix.
Serve immeditately, sprinking some grated cheese on top if you like. I recommend serving this with your favourite bread.

Veggie Stuffed Red Peppers
Red Peppers are one of the highest sources of vitamin C. If you eat 1/2 a pepper with this recipe, you will be getting 85% of your daily vitamin C intake! The black beans & rice create a complete protein, and of course, there’s hidden spinach - adding to the already high antioxidant levels. This recipe also has a filling, comfort food feeling, while being relatively low in calories. Nutritious & delicious!
This recipe takes about 1 1/2 hours start to finish, with about 45 minutes of hands-on time, and makes 8 servings.
It keeps in the refrigerator for 3 days.
Ingredients
3/4 cup brown rice, uncooked
4 medium-sized red peppers, with a good square shape, cut in half, seeds removed
olive oil for cooking
2 large onions, chopped finely
4 cloves garlic, minced
1 tbsp red pepper flakes
1 tbsp oregano
salt & pepper
3/4 cup of corn
2 bunches spinach, or 1 big bag, washed and chopped finely
1 cup black beans
1 cup tomato puree
Your favourite white cheese, grated
The Process
Rinse rice in cool water, and drain. Then, cook in 5 cups of boiling water, for approx. 20 minutes. When it is al dente, drain the excess water, and set aside.
Meanwhile, saute onions in a splash of olive oil a large saucepan under med-low heat, making sure they don’t stick or brown (if they do, turn the heat down). Once they are quite translucent, after about 10 minutes, add the garlic and keep sauteeing to avoid sticking. After 5 minutes, add spices (red pepper flakes, oregano, dash of salt & pepper).
Preheat oven to 375
To the saucepan, add the corn, & spinach, gently stirring it in until it wilts. Then gently stir in black beans, cooked rice, and tomato puree. Once everything is combined and heated through (about 5 minutes), turn off the heat.
Lightly coat the outside of the red peppers in olive oil. Place on a large baking tray, and then fill each pepper with the rice-bean-veggie mixture. Pack it in well.
Once all the peppers are filled and arranged on the baking tray, bake for 30 minutes, and then sprinkle on cheese and bake for another 5-10 minutes.
Serve immediately and enjoy!
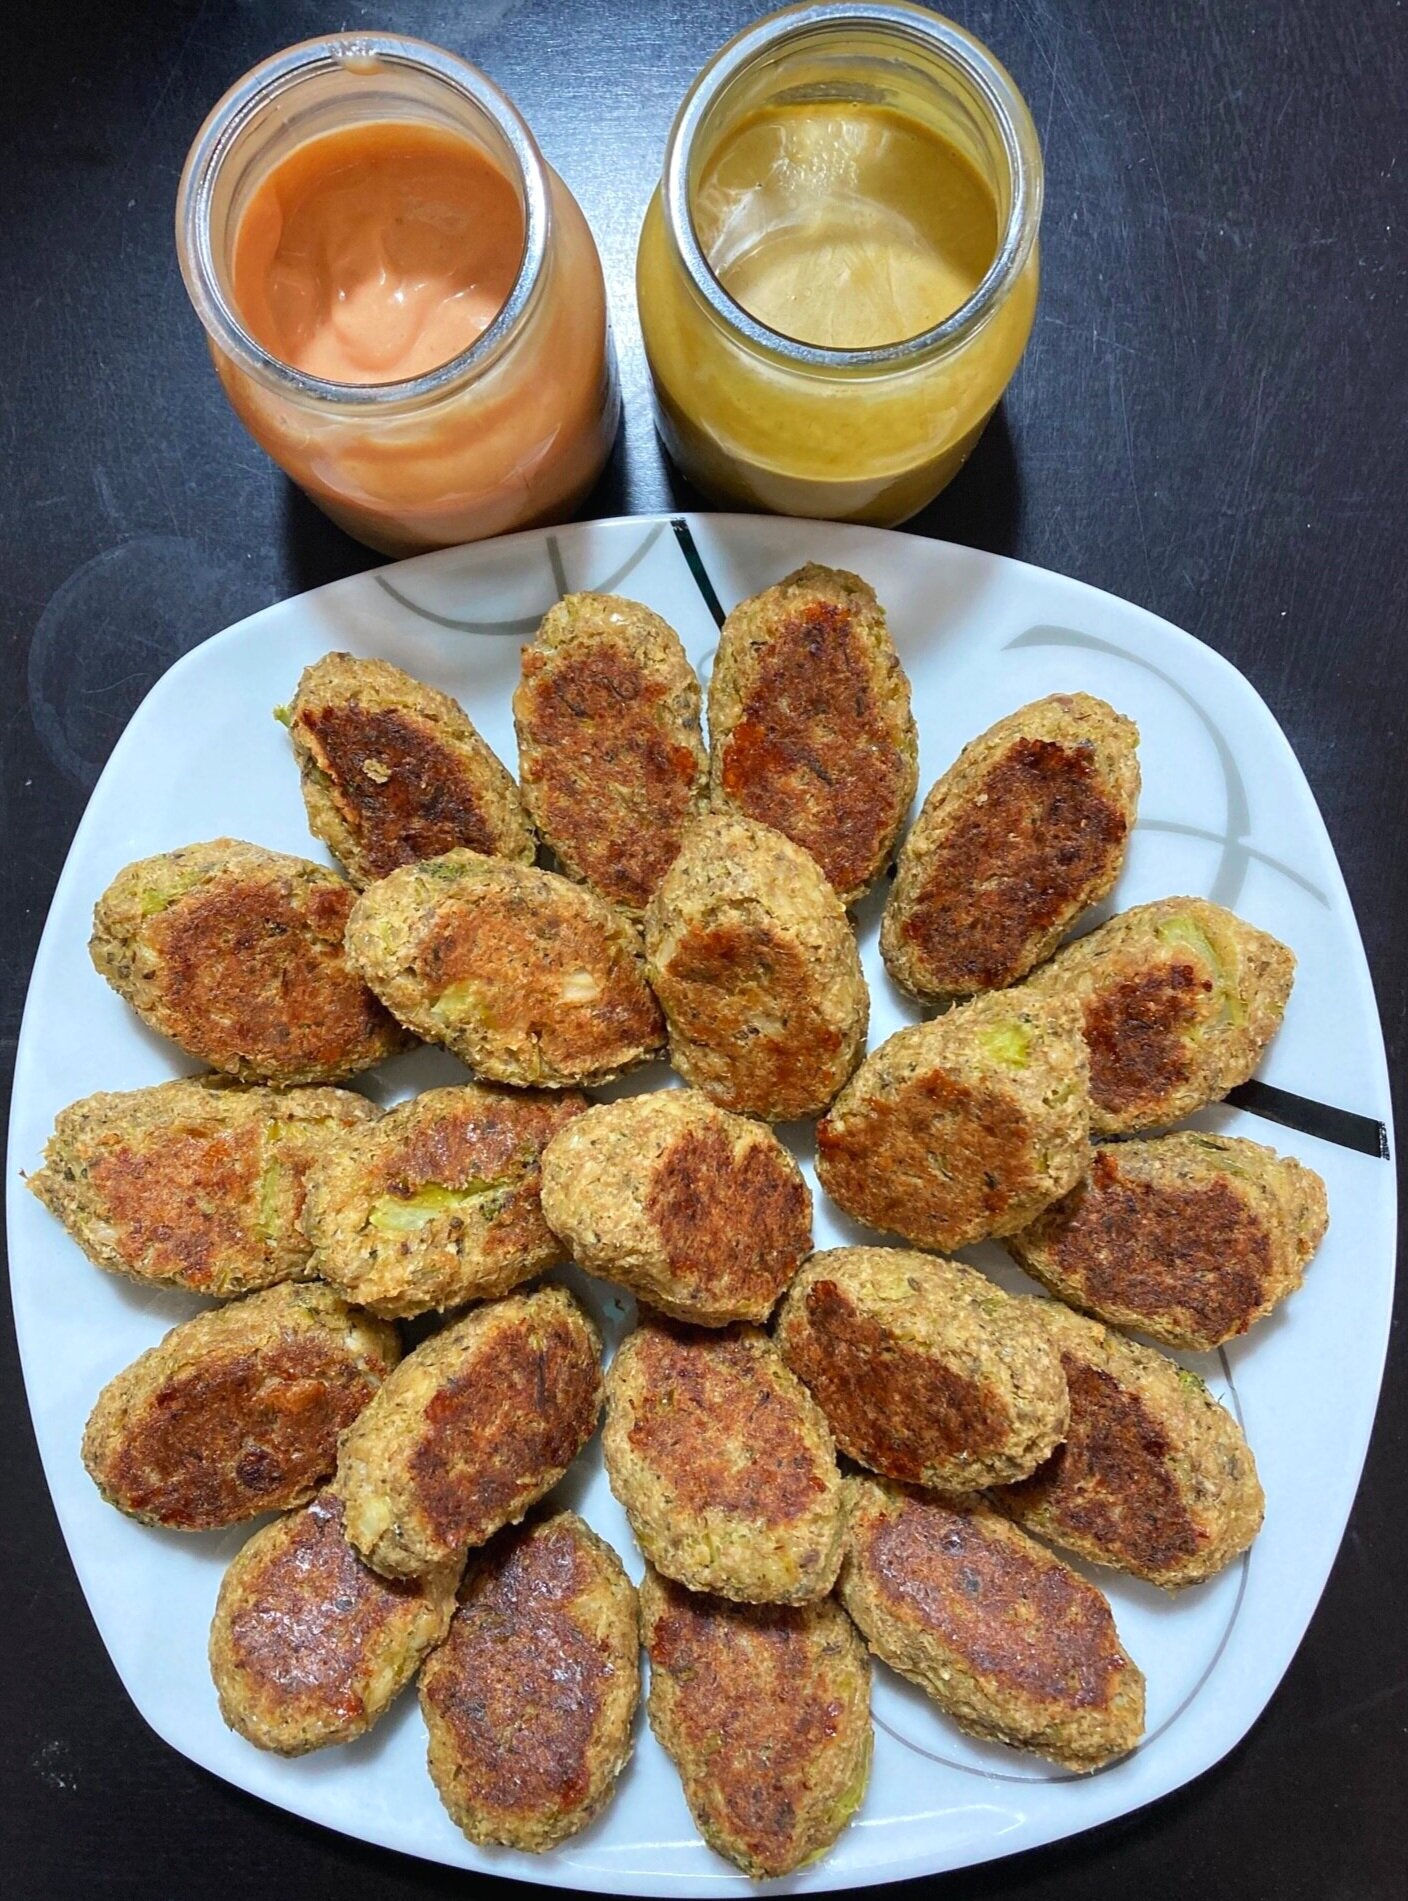
Broccoli Cauliflower Bites
This recipe takes about an hour from start to finish (with very little hands on time) and makes approximately 40 bites. They are filling, and so are great as an appetizer or side, serving up to 8 . You can half the recipe, and/or use just broccoli or cauliflower if you want to make a smaller amount.
They last 5 days in the fridge, and freeze really well also.
Ingredients
1 big head each of broccoli & cauliflower, washed & chopped into approximately 2 inch chunks
1 1/2 cups asiago or white cheddar cheese, grated
1 1/2 cups of whole wheat breadcrumbs - plus 1/2 cup extra just in case
4 eggs, beaten separately
1 tsp each garlic & onion powder
salt & pepper
Quick sauce options
Mix equal parts mayo & ketchup
Mix 2 parts mayo to 1 part dijon mustard, and 1/4 part honey
Mix equal parts mayo & bbq sauce, with a tiny splash of apple cider vinegar & worcestershire sauce.
The Process
Steam the veggies in a veggie steamer (possibly in 2 batches). The water level should be just below the steamer. Steam for 5 minutes, or until veggies are easily pierced with a fork. Once they are steamed, reserve the extra water (just in case), and mash the veggies with a potato masher or food processor, until just chunky (not until it is total mush!)
Preheat oven to 375F
Combine all the ingredients together in a bowl, mixing well by hand (no food processor). If it is very wet, add more breadcrumbs, or if too dry, some of the reserved veggie water. Form into small egg-shaped balls and place on an oiled or paper-lined sheet (I greased my baking pan with olive oil and it worked really well).
Bake for 20-25 minutes, until bottom is nicely browned. Flip over, and bake 20-25 minutes more, until both sides look perfectly browned.
Serve warm with your favourite sauce options!

Hidden Greens Egg Muffins
These muffins are a great for a snack, breakfast, or anytime you need some quick protein & greens!
They are quick to make, and very versatile! While I add spinach & broccoli in these, onion, peppers, mushrooms - the possibilities are endless. In this recipe, I roast the broccoli beforehand, but you could also add the broccoli raw - I have done both and love both ways.
Ingredients
1 large head of broccoli, chopped into small florets
1 bunch/bag spinach, washed & coarsely chopped
12 eggs
1/2 cup of your favourite cheese, shredded
Vegetable oil, for the muffin tray
Olive oil
Salt & pepper
The Process
Preheat the oven to 400F
Generously coat a non-stick 12-muffin tray with vegetable oil and set aside.
When oven is ready, place the broccoli on a baking tray, lightly coated in olive oil and salt & pepper, and roast for 15 minutes. When the broccoli is done, set the broccoli aside, and turn the heat down to 350F.
While the broccoli is roasting, steam the broccoli on the stove - using a saucepan & a veggie steamer & filling the saucepan with water until it is just below the level of the broccoli. Set the heat to high, and turn the heat off when the water just comes to boil, as spinach wilts very quickly. One it is wilted, let it cool enough that you can squeeze out the excess water.
Whisk together the 12 eggs in a bowl, with a pinch of salt & pepper. I like to whisk a lot, so the eggs get frothy.
Fill each greased muffin cup with equal amounts of spinach and broccoli to about 3/4 full.
To pour in eggs, it is best to use a cup that has a ‘pour spout - such as on a measuring cup. Pour the eggs in slowly to each muffin cup, until 3/4 full.
Sprinkle with cheese.
Bake for 15-20 minutes, until the eggs are set. They will puff up quite a bit as they cook, and then settle down as they cool down. Let cool for 10 minutes before removing. To remove, run a knife or spatula around the inside of the cup.
These last for up to 5 days in the fridge.
Enjoy!

Wilted Greens & Roasted Veggie & Bean Salad
I have posted several wilted green salad ideas, because I love how wilting allows me to actually eat more greens (raw spinach salad doesn’t actually excite me very much), and how adding different veggies can make such a different flavour combination. This recipe uses roasted veggies & chickpeas - which I also love because they are so quick & simple to make and are so flavourful. The goat cheese adds a sharp creaminess, and my usual honey-mustard dressing gives everything a kick. Let this recipe inspire you to find other veggie & bean/pea combinations where you can get lots of greens in, while keeping your tastebuds happy.
This recipe is enough for 6 as a side dish, or for 4 as a main.
Ingredients
6 cups spinach, washed and coarsely chopped
1/2 of a butternut squash, cut into small squares
6 green onions, ends trimmed, washed, & halved
2 cups cooked or canned chick peas, rinsed, patting off extra water
olive oil, salt & pepper
1/2 cup goat cheese
Dressing:
1/3 cup olive oil
3 tbsp white vinegar
2 tbsp dijon mustard
1tbsp honey, melted
salt & pepper
The Process
Preheat oven to 400f
Spread the squash on a baking tray, drizzle with olive oil, and S&P, and mix so everything is lightly coated, making sure the squash are not crowded (if there is not enough space between the veggies, the squash will bake instead of roast). Roast for 20 -30 minutes (depending on the size of your pieces), turning squash over at the 1/2 way point. If you have room in your oven, you can also place a separate tray with the green onion - also lightly coated in oil, salt & pepper, and if there’s room, the chickpeas can be on the same pan, as is (no oil, etc). Roast these for about 20 minutes, until the onions are lightly browned, and the chickpeas are a little bit dry & crispy. If you don’t have room for both trays in your oven, no problem, just roast the trays separately.
At any point you can wash & chop the spinach, and place into a big salad bowl, ideally that has a lid.
Also whenever you have a free moment, you can whisk together all of the dressing ingredients and set aside.
As the roasted veggies & chickpeas are done, add them to the salad bowl, gently stirring them in so they don’t get crushed, and then place the lid on top so the spinach wilts from the heat of the veggies.
Serve warm with goat cheese, and dressing.
Enjoy!
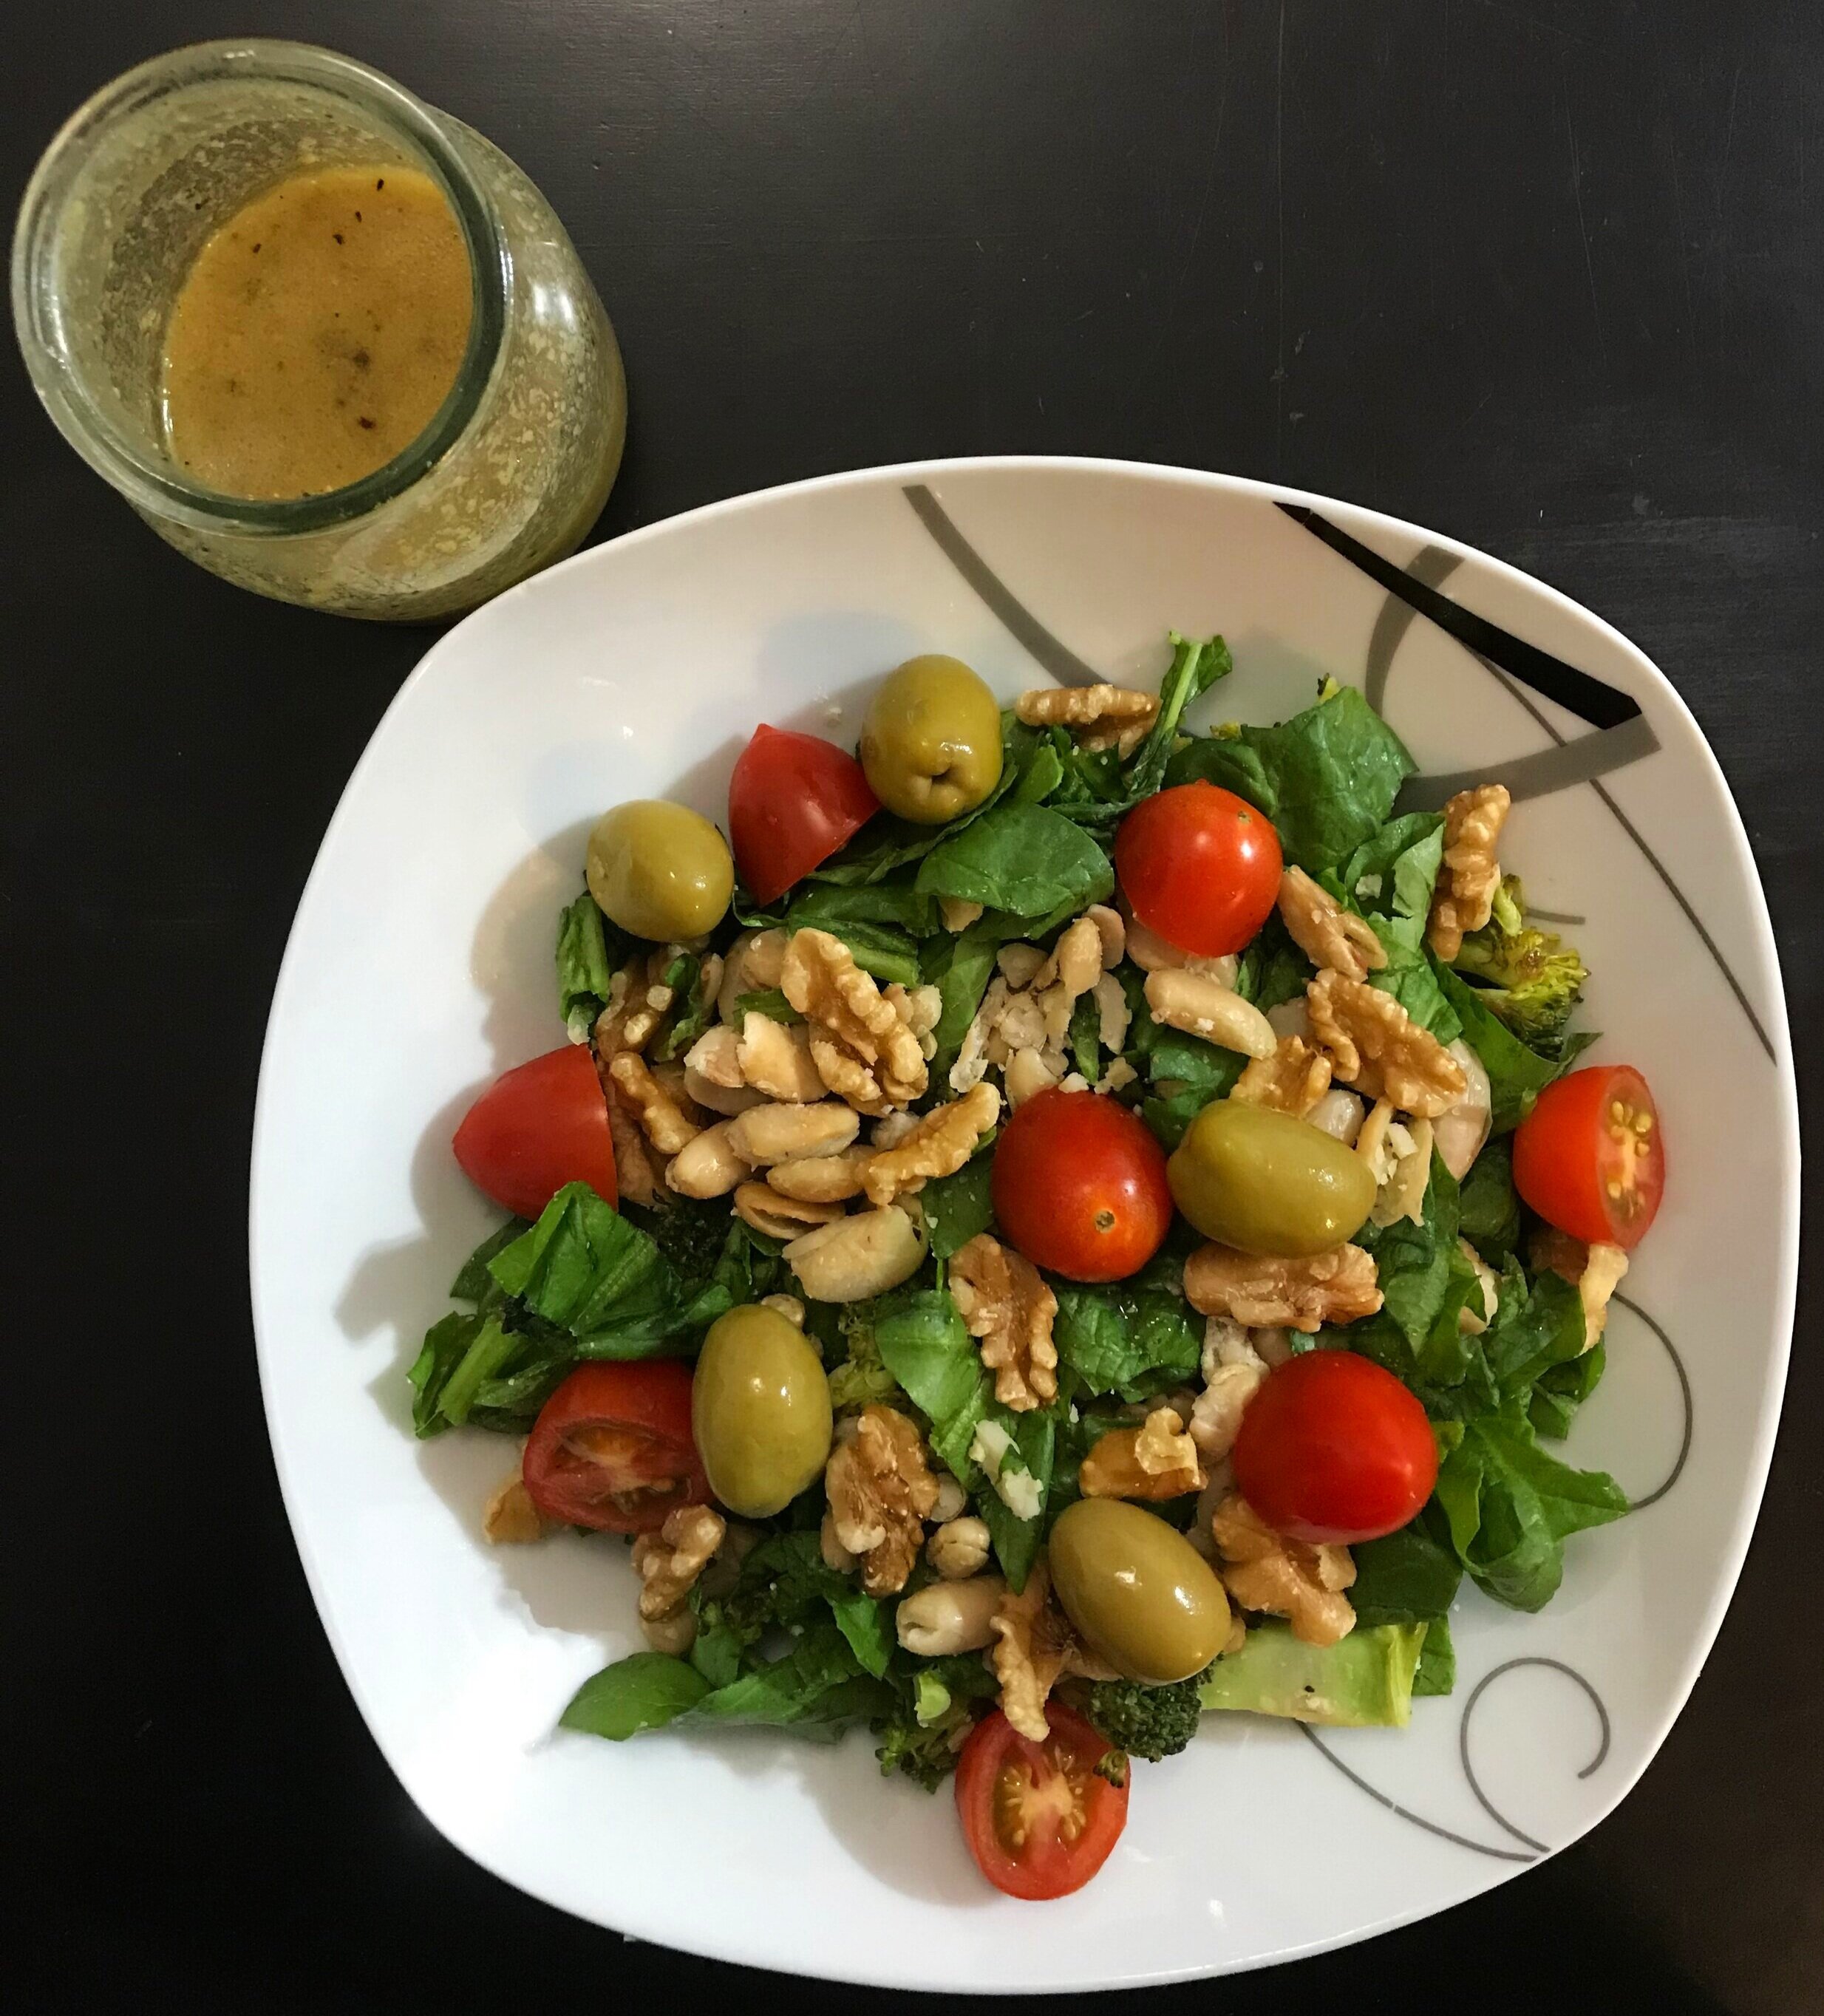
Quick, Nutritious & Delicious
Wilted Greens & White Bean Salad
This salad is perfect for those moments when you want a healthy salad as a side or main dish, and while you don’t have the time/energy for anything elaborate, you still want lots of flavour.
The mix of flavours & textures is fabulous, and the dressing sharpens everything up!
The roasted broccoli, toasted walnuts & beans are gently stirred into the greens, which wilts them just enough to make them soft without soggy. The combination of beans & nuts makes this a complete protein salad, along with being full of superfood greens.
Serves 6 as a side, 4 as a main dish, and takes about 45 minutes from start to finish, with very little hands on time.
Ingredients
1 large head broccoli, cut into small florets
olive oil, salt & pepper
2 cups white beans, cooked/canned & rinsed (I used cannelini, but navy also works)
1 cup chopped walnuts
4 cups spinach, washed & coarsely chopped
2 cups arugula, washed & coarsely chopped
1 cup cherry tomatoes, halved
1 cup green olivevs, pitted
Dressing:
1/3 cup olive oil
3 tbsp white vinegar
2 tbsp dijon mustard
1tbsp honey, melted
salt & pepper
The Process
Preheat oven to 400f, as you prepare the ingredients
When oven is ready, toss broccoli in olive oil, and salt & pepper - lightly coating, and place on a baking sheet, roasting for 20-ish minutes - depending on how carmelized you want your broccoli.
Whenever you have a moment in the cooking process, mix together all the dressing ingredients, whisking or shaking them together, and set aside.
Place chopped spinach & arugula in a large salad bowl, and when broccoli is done, gently stir the broccoli into the greens, and cover the bowl, so the heat & steam can wilt the greens.
Spread the white beans and nuts onto the same baking sheet, and roast for 8-10 minutes - watching that the walnuts are just toasted, and not burned. Gently stir them into the greens, making sure not to crush the beans, and once more, cover the bowl to continue to wilt the greens.
When you are ready to serve, plate the salad, top with tomatoes & olives, and then gently adding the dressing.
That’s it! Enjoy!

Hidden Spinach Chili
It is hard to see the spinach here, isn’t it?? Well, it’s there - a whole big bunch. It is worth hiding spinach in your next stew or sauce - it is full of vitamins C, A (powerful antioxidants), K1, iron, calcium, folic acid, & nitrates. This recipe tastes fabulous with any kind of ground protein - animal or plant sourced.
This takes about an hour from start to finish and serves 6 hearty-sized meals.
Ingredients
1lb ground protein (beef, chicken, turkey, or veggie)
Olive oil
3 medium onions, chopped
1 tbsp honey or your favourite jam
4 garlic cloves, chopped & minced
2 medium red peppers chopped into squares
1 tbsp ea oregano, red pepper flakes & 1 tsp ea cumin & chili powder (to your desired heat)
1 tsp ea salt & pepper
1 cup corn, fresh, frozen, or canned
1cup cooked/canned black beans, rinsed
1 cup cooked/canned red kidney beans, rinsed
2 cups diced tomatoes in juice
1 cup broth (veggie, or the same as which protein is used)
1 big bunch/bag spinach, washed and roughly chopped
Optional toppings/sides: cilantro, grated cheese, avocado slices, plain nacho chips
The Process
Brown the ground protein, and then set aside.
In your stew pot, place 1 tbsp of olive oil & onions on low-medium heat, and cook for up to 20 minutes as you prepare other veggies, making sure it doesn’t brown - the longer it cooks, the lower the heat (I like slow cooked onions a lot!).
Turn heat to medium. Add honey/jam, & garlic and saute 5 minutes, making sure it doesn’t stick. Then add red pepper and all herbs & spices, and cook for 5 minutes, until peppers are just soft.
Add corn, beans, tomatoes, & broth, bring to a boil, and then lower heat to simmer for 10-15 minutes.
Still simmering, stir in protein & spinach and cook until everything feels well blended - 10 -15 minutes.
Serve with toppings/sides of your choice: I like cilantro, grated cheese, avocado slices, and plain nacho chips.
Enjoy!

Triple Green Pasta
(aka Avocado-Spinach-Basil Pasta)
Because I also used spinach noodles (pappardelle, to be exact) it’s hard to see that this is actually a pasta dish - the green noodles are hidden in the green sauce!
This sauce is so easy to make and is truly delicious, there really is no excuse not to make it right now and enjoy.
I actually had leftover sauce (the avocado is so rich tasting that you don’t need a lot of sauce) and I put it in a tupperware, with some plastic wrap over the sauce - and it stayed super green for the next day!
I put on my favourite toppings to add contrasting flavours to the creaminess of the sauce: fresh tomato, green olives, roasted red onion, freshly grated parmessan - so feel free to experiment with your favourite flavour combinations.
I used an immersion blender to make the sauce. You could equally use a food processor or anything like that, but if you don’t have anything like that, you will need to chop the spinach & basil very fine, then use a potato masher to combine the sauce.
Serves 4
Ingredients
Your favourite pasta cooked for 4 people: I used spinach pappardelle and it held the sauce & veggies perfectly.
Triple Threat Sauce
2 ripe soft avocados, peeled, with seed removed
1 bunch/bag (about 4 cups) spinach, washed & coarsely chopped (if you don’t have a blender of some sort, chop it very fine)
1 cup fresh basil, washed & coarsely chopped (if you have no blender of some sort, chop very fine)
3 large cloves garlic - I roasted these whole with the onions to reduce some of the intensity. You can add them raw to the sauce - I would reduce it to 2 cloves though.
3 tbsp lemon juice
1/3 cup olive oil (give or take so the sauce has a consistency that you like)
Added toppings
2 large red onions, sliced
1 tomato cut into cubes
1/2 cup green olives
1/2 cup grated parmessan
Salt & Pepper
The Process
Preheat oven to 400F
Cook pasta to your liking as you prepare everything else. When pasta is ready, rinse, and return to pot (stove turned off), with a light dash of olive oil, and cover, so it stays warm.
When oven is ready, lightly coat onions & garlic (separated) in olive oil, and a light dusting of salt & pepper, and place on a roasting tray and roast for 20-30 minutes - to your taste. If you choose not to roast the garlic, and add it raw to the sauce, use 2 cloves instead of 3.
Prepare all the other toppings (cut tomatoes, grate cheese, etc)
Combine all sauce ingredients EXCEPT olive oil (make sure you add the roasted garlic), and blend or mash with a potato masher, until creamy, then pour in olive oil and blend/mash briefly until well combined.
To serve
It’s great if the pasta and the onions can still be warm. On a bed of pasta, add the sauce, then a smattering of the toppings & enjoy immediately.

White Bean, Potato & Spinach Soup
I love using miso as a broth - it’s fermented, meaning it’s good for the gut microbiome, as well as being filled with essential vitamins & minerals, AND having a very rich, earthy flavour. All the other ingredients of this soup are also jammed with nutritional goodness, making the fact that it tastes like a warm hug feel all the better.
I like making soups early in the day, and then letting them sit for a few hours, before reheating and eating - so there has been time for the flavours to combine. Leftovers the next day are also usually better.
This makes a medium pot of soup - about 4 meal-sized servings, or 6 servings as a side.
Start to finish it takes about 40 minutes to make. Very simple to make and very wholesome to eat.
Ingredients
1 tbsp olive oil
2 large onions ( about 21/2 cups) coarsely chopped - In ‘The Process” you will see that I recommend getting these going on the stove right away, slowly carmelizing them, as you wash and chop all the rest of the ingredients.
3 large garlic cloves, minced
1 tablespoon of your favourite non-berry jam or marmelade (I used fig jam, but orange marmelade, or even apple sauce would work - to give a bit of sweetness to the soup)
1 large potato, cut into small cubes
3 cups miso broth (I use a miso paste, adding 2 tablespoons to hot water)
4 cups coarsely chopped spinach
1 cup coarsely chopped parsely
1 cup cannellini beans (or any other white bean), rinsed
1 tbsp soy sauce
1 tbsp Worcestershire sauce
1-1/2 tbsp mixed dried herbs (a mix of parsley, thyme, oregano, sage, for example)
The Process
Heat the olive oil in your soup pot under medium heat. Add chopped onions & once they start to saute, turn heat down to low and slowly carmelize them for about 20 minutes, as you wash and chop the other ingredients. Make sure they don’t stick to the bottom, adding a tiny bit of water if they do.
So - once you have all the other ingredients ready, and after about 20 minutes of carmelizing, add the garlic and jam, sauteeing for another 5 minutes, making sure nothing sticks.
Then, add the potatoes & broth, bring it all to a boil, and then turn the heat down to a simmer, for about 10 minutes.
After the potatoes can be broken with a fork, (soft, but definitely not mushy) add the spinach, parsley, beans, soy & Worcestershire sauces, and herbs, simmering for another 5 minutes. Feel free to add more broth to your desired liking.
Turn off the heat, & let it sit for 10 minutes before serving with some crusty bread, or let it sit for a few hours or even overnight, as soups are almost always better after taking some time for the flavours to combine.
Enjoy!
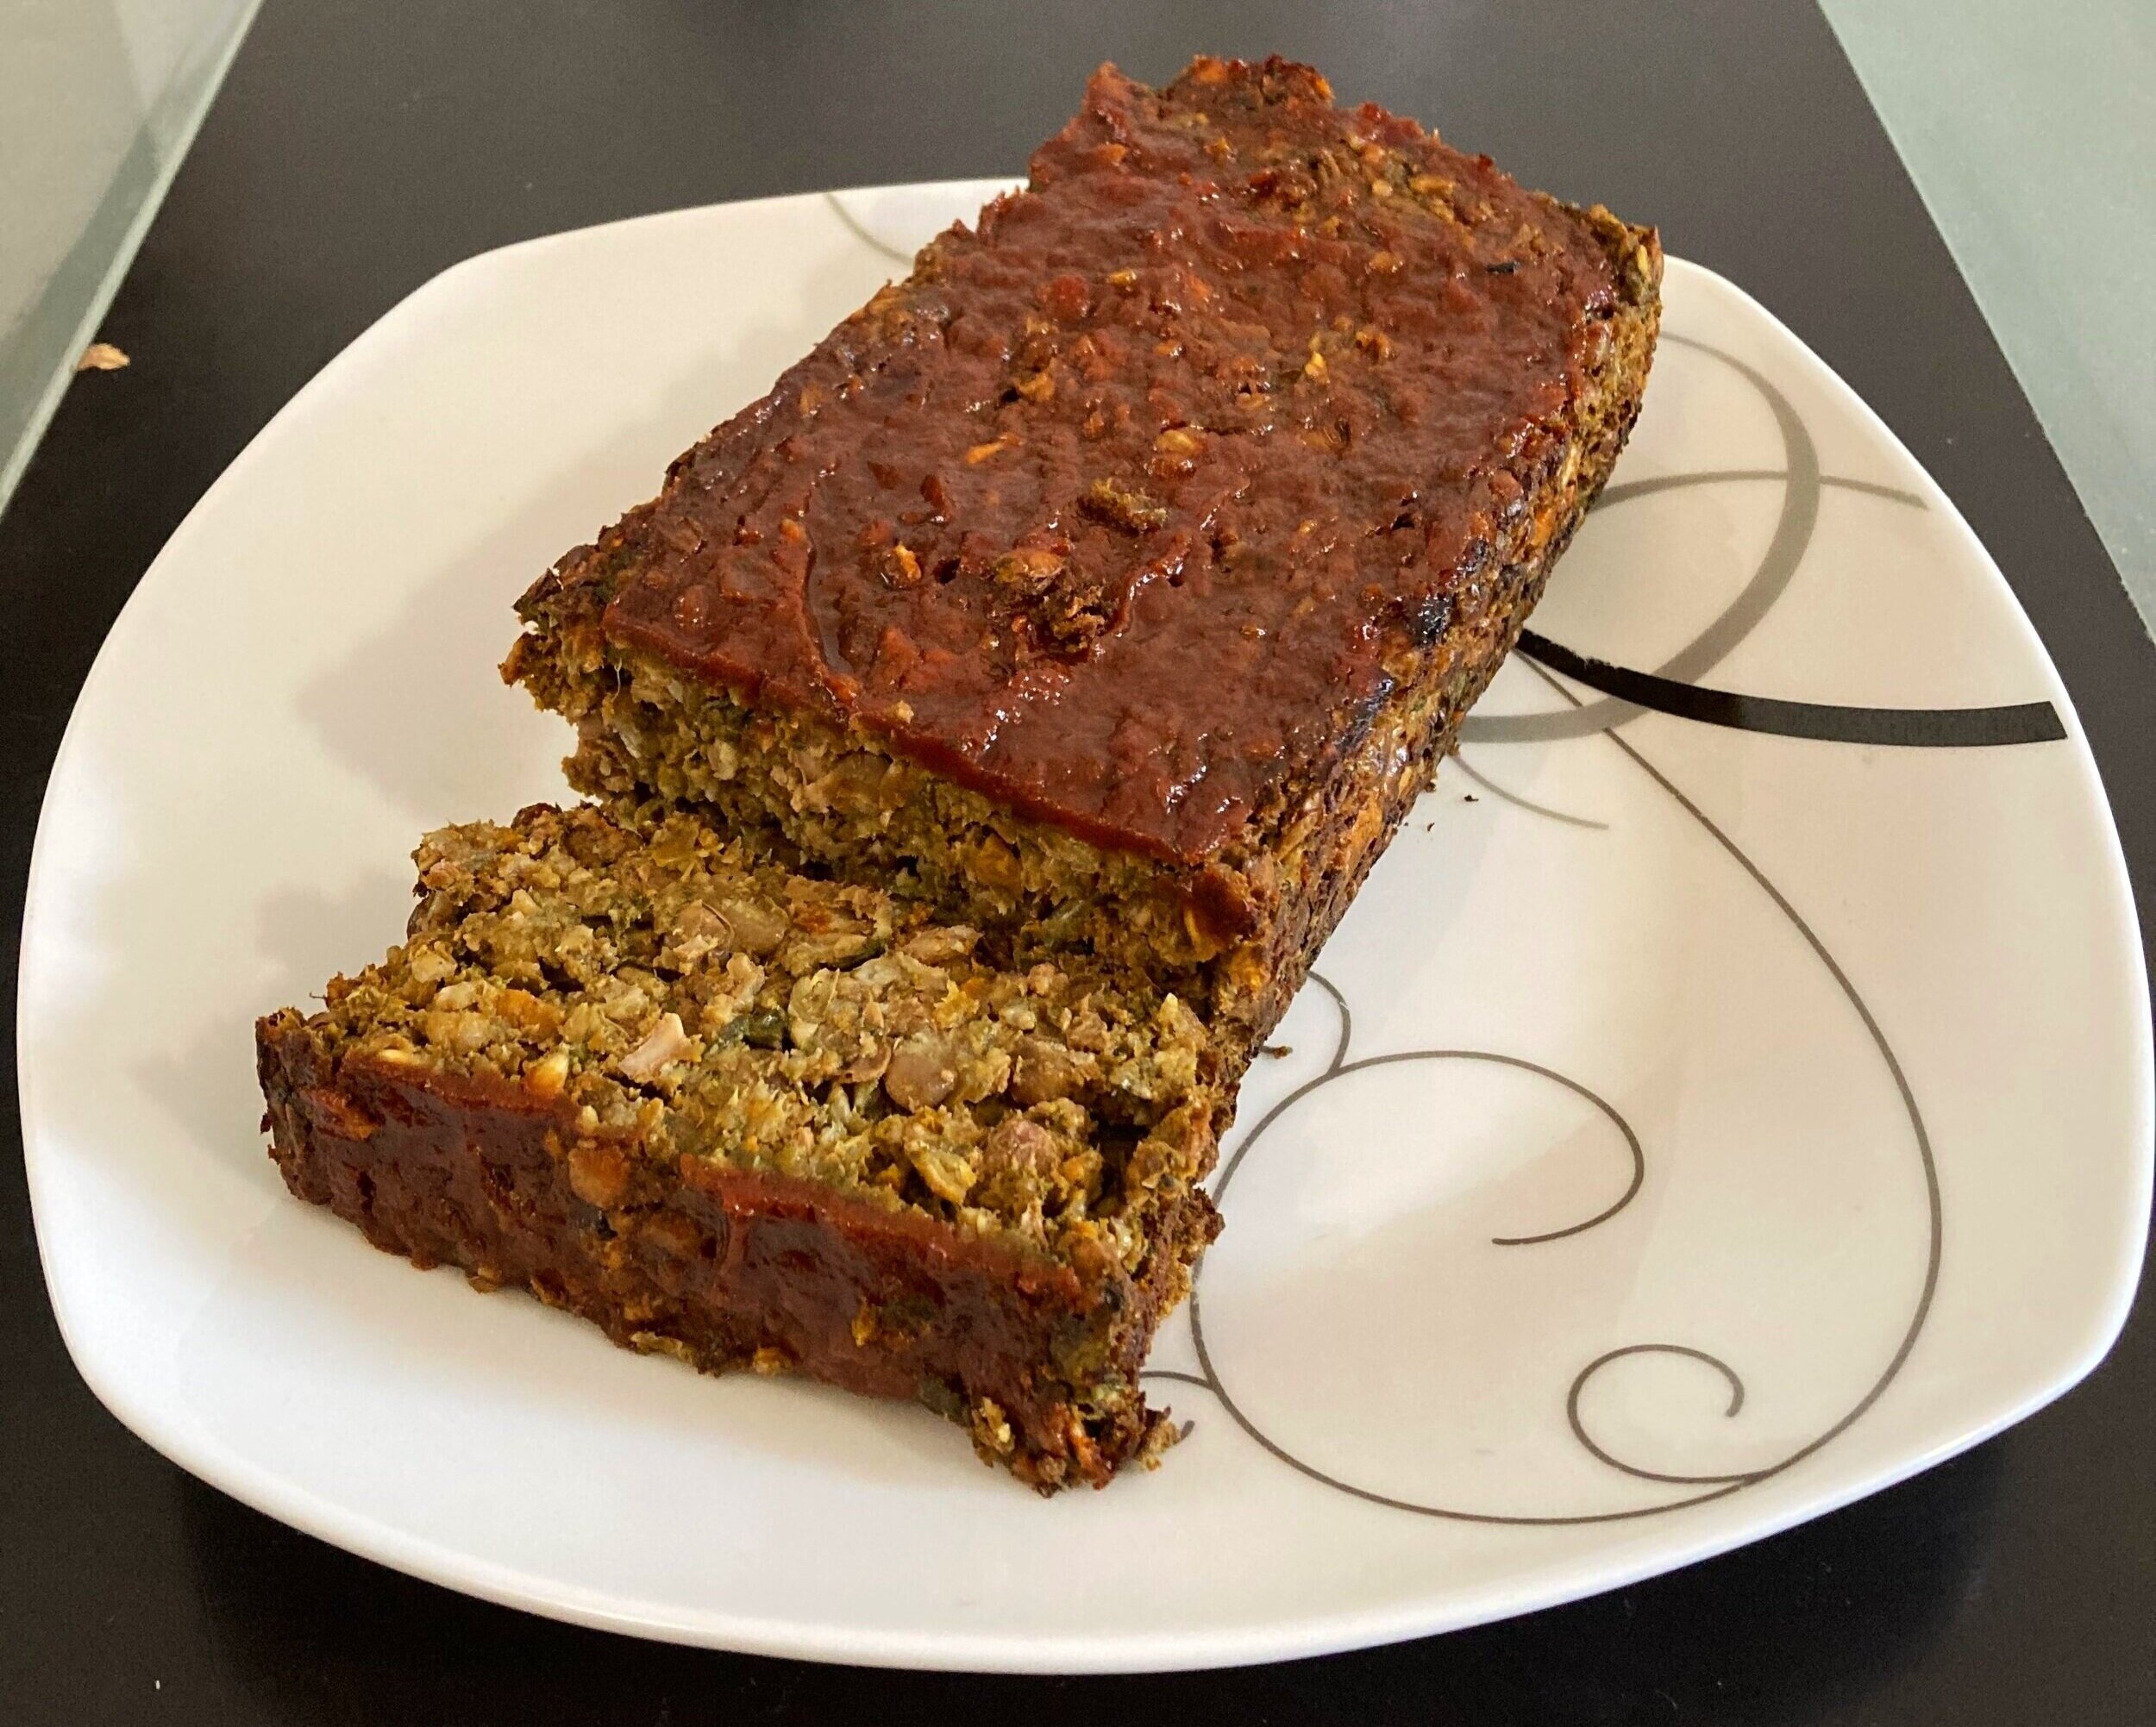
Veggie-packed, Protien-rich
Lentil Loaf
This is easier to make than it looks, and is very delicious as a side dish, or as a main course. The combination of lentils, oats, & walnuts makes this loaf full of complete proteins, plus it is jammed with hidden veggies for extra essential vitamins & minerals. For those who prefer meatloaf (or hamburgers or chicken burgers) I encourage you to add the veggies to your favourite meat recipe, as a way of sneaking more veggies in - the result is a richer more interesting flavour, and many more vitamins & minerals.
About 1 hour of prep time, plus additional hour of cooking/cooling time.
Makes 1 5x12 loaf - lined with parchment.
Leftovers can be stored in the fridge for up to 4 days, and this can be frozen. This does taste better the next day.
*if you don’t have a food processor/immersion blender, and are going to mash the veggies with a potato masher, it is best to chop the veggies more finely from the beginning. If you are using a machine to mash, it should chop the veggies fine on its own.
Ingredients
3/4 cup dry green lentils - rinsed in water, picking out any discolored or floating ones.
1 1/2 cups water
1 bay leaf
1 tbsp olive oil
1 large onion (about 1 heaping cup), chopped
3 cloves garlic, minced
2 stalks of celery, chopped
1 medium sized carrot, thinly chopped
1/2 cup chopped walnuts - toasted for about 10 minutes at 350
1 bag/bunch Spinach, washed & coarsely chopped
1 cup rolled non-instant oats
3 tbsp tamari soy sauce
3 tbsp tomato paste
1 tbsp honey (melted)
1 tsp apple cider vinegar
dried herbs - 1 tsp ea dried oregano, parsley, thyme, red pepper flakes
1/2 tsp ea salt & pepper
Glaze: the glaze adds a great zing to the loaf. Make sure you have enough to generously spread on top, and if not, increase amounts of these ingredients.
5 tbsp tomato paste
2tbsp honey (melted)
3 tbsp balsamic vinegar
The Process
Preheat oven to 375 F
Cook rinsed lentils in the water & bay leaf, by first bringing it all to a boil, then lowering heat to a simmer. Cook 15-20 minutes. Lentils should be soft but not totally mushy. Drain any leftover water, if there is any, and discard bay leaf.
Meanwhile, you can toast the walnuts once the oven is to temperature - 8-1o minutes.
Also in the meantime, saute on medium heat, onions, garlic, carrot & celery in a pan, until soft and fragrant - 10-15 minutes. Be careful not to brown or scorch garlic.
Put all of this in the food processor, or if you are using an immersion blender or potato masher, add to a large bowl:
lentils - reserving 2/3 cup
walnuts
sauteed veggies
spinach
the remaining loaf ingredients: from oats to salt & pepper
Pulse/mash until ingredients are broken down to small chunks, not totally mushy. Add in the remaining lentils.
Pour into your parchment-lined loaf pan, and press it in well.
In a small bowl, combine all the glaze ingredients & spread over top of loaf.
Bake, covered with foil, for 30 minutes. Bake uncovered another 10 minutes. You can stick in a toothpick - it won’t come out totally clean when it’s cooked, but you will see if it is still soft & needs more time. Let the loaf sit for 15 minutes before removing from the pan and slicing.
Enjoy!

Banana Zucchini Walnut Raisin Muffins
Muffins are super easy to make, easily modified, and are a great snack. Banana add natural sweetness & fiber, so very little extra sugar needs to be added.
This recipe makes about 12 large muffins and takes about 20 minutes to assemble and 25 minutes to bake.
Ingredients
2 large eggs
2 very ripe bananas
1/3 cup honey or sugar
1tbsp vanilla extract
1/2 cup melted butter or coconut oil
2 cups zucchini
2 cups whole wheat flour
1 tsp ea of baking powder & baking soda
1/2 tsp salt
optional 1/2 tsp of nutmeg & 1 tsp of cinnamon
1 cup roughly chopped walnuts
1 cup raisins/dried cranberries/fresh or frozen blueberries
The Process
Preheat oven to 350 F
Lightly cover muffin pan with butter or coconut oil - or use muffin cups.
In a large bowl, we will add all the wet ingredients: first add the eggs, and beat until frothy. Then mix in the banana and mash it as much as possible. Then mix in the honey/sugar, vanilla, & butter/oil and beat well until smooth.
Stir in the zucchini.
In a separate bowl, mix together all of the dry ingredients (flour, salt, baking pwd, & soda, spices)
Stir the dry ingredients, plus the walnuts & raisins/cranberries/blueberries into the wet ingredients. Stir just until mixed in - don’t overmix or your muffins will be tough. The batter should be ‘not quite able’ to stick together. Add more flour if it’s too wet, and a little bit of milk if it’s too dry.
Fill each muffin cup 3/4 of the way, and bake for approx 20-25 minutes. Test for doneness by inserting a toothpick all the way through to see that it comes out clean, and by gently pressing on top of the muffin to make sure that it bounces back.
Let muffins cool for at least 5 minutes minutes before taking out of the pan, using a small spatula or knife to carve them out as cleanly as possible. Let cool for another 15 minutes before enjoying!